
There is something incredibly comforting about a dessert that comes together with almost no effort. Dump cakes are exactly that kind of magic. You layer the ingredients, slide the pan into the oven, and let the heat transform everything into a warm, bubbly, golden masterpiece. Trust me, you are going to love this. Whether it is fruity, chocolatey, or cinnamon swirled, dump cakes are the ultimate easy dessert.
The Beauty of Simple Baking
Dump cakes are beautifully uncomplicated. There is no complicated mixing, no fancy equipment, and no long prep time. You simply layer fruit or filling on the bottom, sprinkle cake mix over the top, drizzle with butter, and bake.
As it cooks, the fruit becomes jammy and rich while the cake mix turns golden and buttery. The contrast of textures is what makes it so irresistible.
And now let dive to why this style of dessert became such a household favorite.
Why Dump Cakes Became So Popular
Dump cakes gained popularity decades ago because they were fast, affordable, and nearly impossible to mess up. Busy families loved that they could create a crowd pleasing dessert with pantry staples.
Over time, creative variations appeared, from berry versions to cinnamon roll inspired twists. The base method stayed the same, simple layering and oven magic.
Why You Will Keep Coming Back to This
Before we move into the ingredients and method, here is why dump cakes deserve a permanent spot in your dessert rotation.
Versatile: Endless flavor combinations.
Budget-Friendly: Made with simple store bought ingredients.
Quick and Easy: Minimal prep work required.
Customizable: Swap fruits, cake flavors, or add toppings.
Crowd-Pleasing: Always a hit at gatherings.
Make-Ahead Friendly: Tastes just as good the next day.
Great for Leftovers: Reheats beautifully.
Pro Tips for Perfect Dump Cakes
- Spread fruit evenly across the pan.
- Do not stir the layers together.
- Cover dry cake mix spots with butter.
- Bake until bubbling around the edges.
Essential Kitchen Tools
9×13 Inch Baking Dish: For even baking.
Spatula or Spoon: For spreading layers evenly.
Oven Mitts: For safe handling.
Basic Ingredients for a Classic Dump Cake
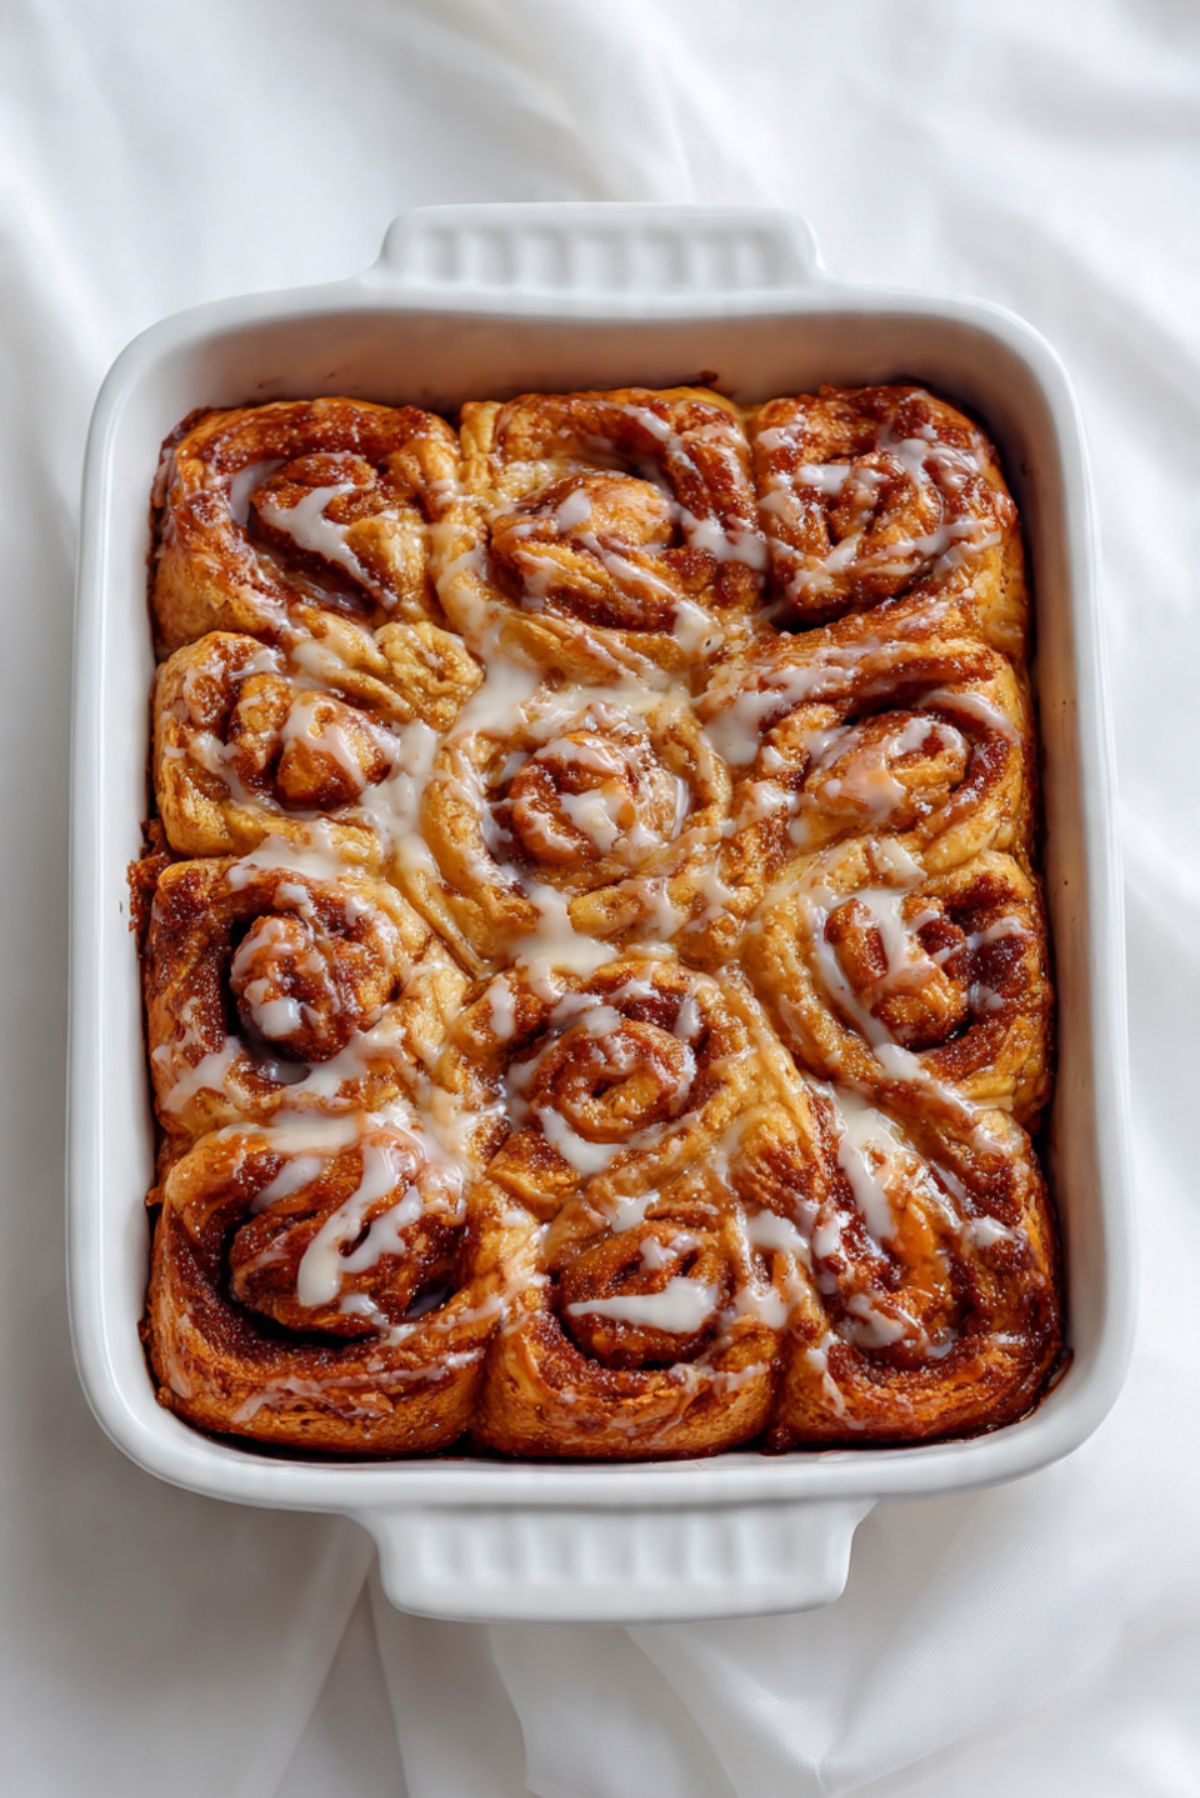
Here is a simple cinnamon roll inspired version.
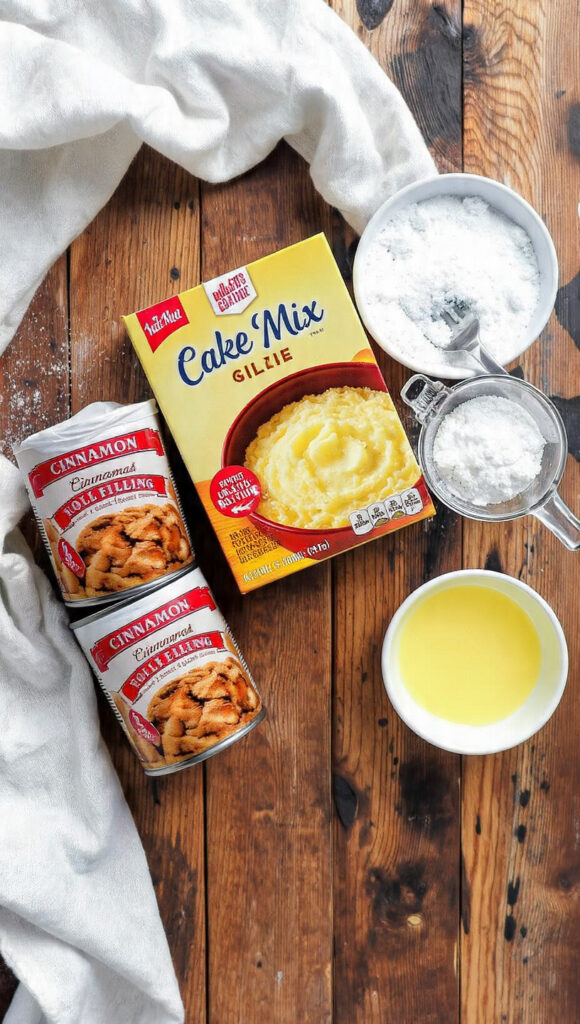
- Canned Cinnamon Roll Filling or Pie Filling: 2 cans, creates sweet base.
- Yellow or White Cake Mix: 1 box, forms topping.
- Unsalted Butter: 1/2 cup melted, creates golden crust.
- Powdered Sugar Glaze: For drizzling after baking.
You can easily substitute blueberry, cherry, apple, or peach filling depending on what you love most.
Let’s Bake It Step by Step
- Preheat Your Equipment: Preheat oven to 350°F and lightly grease a 9×13 baking dish.
- Combine Ingredients: Spread the fruit or cinnamon roll filling evenly in the bottom of the dish.
- Prepare Your Cooking Vessel: Sprinkle the dry cake mix evenly over the filling. Do not mix.
- Assemble the Dish: Drizzle melted butter evenly over the cake mix, covering as much surface as possible.
- Cook to Perfection: Bake for 40 to 45 minutes until the top is golden and edges are bubbling.
- Finishing Touches: Let cool slightly, then drizzle with glaze if desired.
- Serve and Enjoy: Serve warm for best texture.
Texture and Flavor Experience
The bottom layer becomes soft and jammy while the top turns buttery and slightly crisp. When served warm, it feels cozy and comforting, especially with a scoop of vanilla ice cream.
Helpful Tips
- Let rest 10 to 15 minutes before serving.
- Add chopped nuts for crunch.
- Use lemon zest for brightness with fruit versions.
- Watch closely near end of baking.
What to Avoid
- Stirring the layers.
- Skipping butter.
- Underbaking.
Nutrition Facts Overview
Servings: 12
Calories per serving: Approximately 350
Note: Values are approximate.
Preparation Time Breakdown
Prep Time: 10 minutes
Cook Time: 45 minutes
Total Time: 55 minutes
Make Ahead and Storage Tips
Store covered in the refrigerator for up to 4 days. Reheat individual portions in the microwave or oven.
How to Serve Beautifully
Serve warm in shallow bowls with a scoop of vanilla ice cream melting over the top.
Variations to Try
- Blueberry with lemon zest.
- Cherry with chocolate chips.
- Apple with cinnamon and pecans.
- Peach with brown sugar crumble.
FAQ’s
1. Why is it called dump cake?
Because you simply dump the ingredients into the pan.
2. Can I use fresh fruit?
Yes, sweeten it slightly before layering.
3. Do I mix the layers?
No, keep them separate.
4. Can I freeze it?
Yes, tightly wrapped.
5. How do I prevent dry spots?
Cover evenly with melted butter.
6. Is it beginner friendly?
Absolutely.
7. Can I make it gluten free?
Use gluten free cake mix.
8. Can I add nuts?
Yes, sprinkle on top before baking.
9. What cake mix works best?
Yellow or white are most versatile.
10. Can I double the recipe?
Yes, use a larger pan.
Conclusion
Dump cakes are proof that simple baking can still feel special. With just a few ingredients and almost no prep, you get a warm, comforting dessert that everyone loves. Once you make one, you will start dreaming up all the flavor combinations you can try next.
Print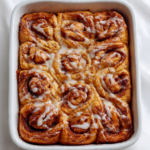
Dump Cakes
- Prep Time: 10 minutes
- Cook Time: 45 minutes
- Total Time: 55 minutes
- Yield: 12 servings
- Category: Dessert
- Method: Baking
- Cuisine: American
- Diet: Vegetarian
Description
An easy and comforting dump cake made by layering sweet filling, dry cake mix, and butter, then baking until golden and bubbly. Perfect for quick desserts with minimal prep and maximum flavor.
Ingredients
- 2 cans fruit pie filling or cinnamon roll filling
- 1 box yellow or white cake mix
- 1/2 cup unsalted butter, melted
- 1/2 cup powdered sugar glaze, optional for topping
Instructions
- Preheat oven to 350°F and lightly grease a 9×13 inch baking dish.
- Spread the fruit pie filling or cinnamon roll filling evenly across the bottom of the baking dish.
- Sprinkle the dry cake mix evenly over the filling. Do not stir.
- Drizzle the melted butter evenly over the cake mix, covering as much of the surface as possible.
- Bake for 40 to 45 minutes until the top is golden brown and the filling is bubbling around the edges.
- Remove from the oven and allow to cool for 10 to 15 minutes.
- Drizzle with powdered sugar glaze if desired and serve warm.
Notes
- Do not mix the layers together to achieve the proper texture.
- If dry cake mix spots remain, drizzle a little extra melted butter over those areas.
- Let the cake rest before serving so the filling thickens slightly.
- Store leftovers covered in the refrigerator for up to 4 days.
Nutrition
- Serving Size: 1 serving
- Calories: 350
- Sugar: 35g
- Sodium: 320mg
- Fat: 16g
- Saturated Fat: 9g
- Unsaturated Fat: 6g
- Trans Fat: 0g
- Carbohydrates: 52g
- Fiber: 1g
- Protein: 2g
- Cholesterol: 35mg