
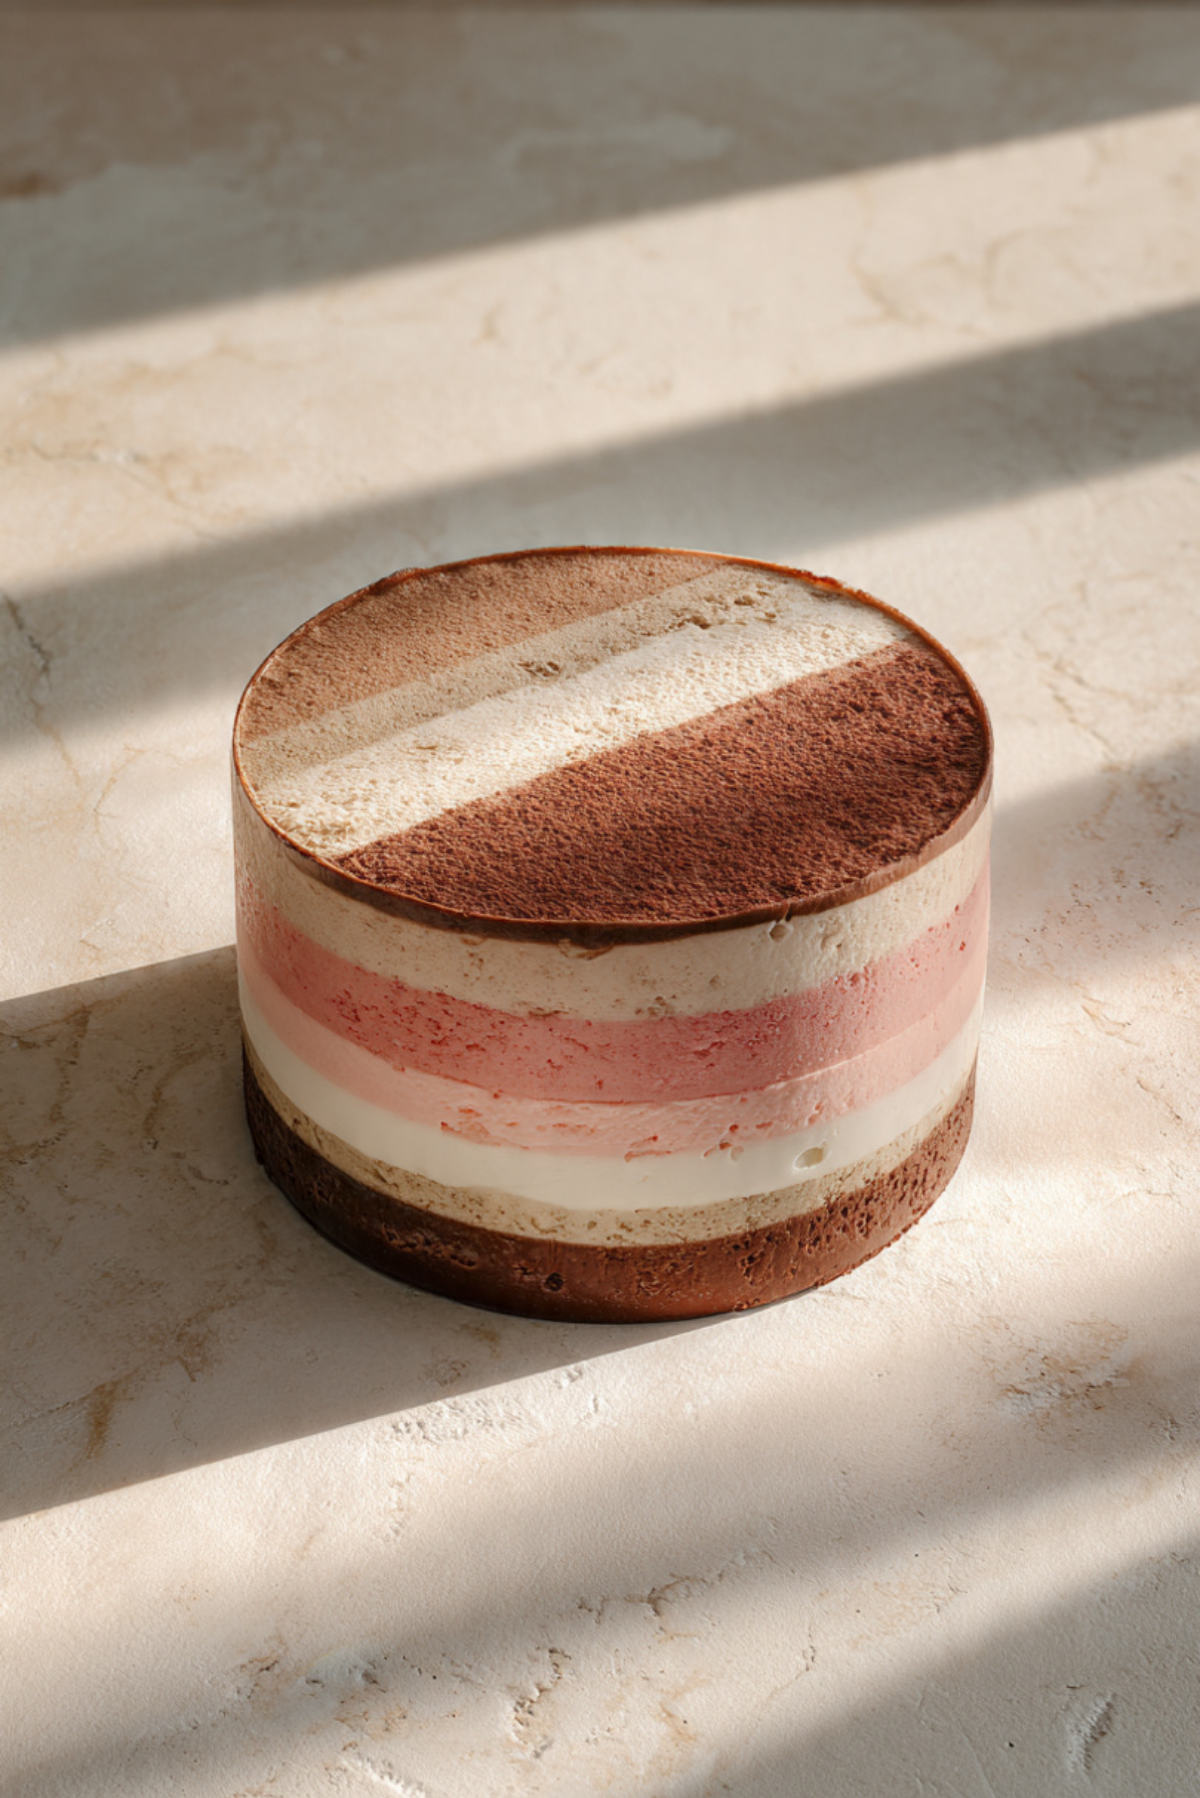
There is something quietly magical about a dessert that looks impressive yet feels comforting at the same time. This Neapolitan Christmas bombe ice-cream cake does exactly that. It brings together familiar flavors, creamy textures, and a festive shape that instantly feels special. The moment you slice into it and see those soft layers of chocolate, vanilla, and strawberry, it feels like a little celebration happening right on the plate. Trust me, you’re going to love this.
A Festive Dessert with Old-School Charm
Ice-cream bombes have been around for generations, often making appearances at holiday tables when ovens were already working overtime. The Neapolitan style, with its trio of classic flavors, adds a nostalgic touch that many of us grew up with. This version leans into that tradition while keeping things simple and reliable, which is exactly what you want during a busy holiday season.
Why This Dessert Always Delivers
This cake is not just pretty, it is dependable, forgiving, and incredibly satisfying to serve. Let me walk you through why it works so well every single time.
Versatile: It fits right in at Christmas, birthdays, or any dinner party where you want something cool and creamy to finish the meal.
Budget-Friendly: Using basic ice cream flavors keeps costs reasonable without sacrificing impact.
Quick and Easy: No baking involved, just layering, freezing, and a little patience.
Customizable: You can swap flavors or add textures without changing the core method.
Crowd-Pleasing: Chocolate, vanilla, and strawberry rarely disappoint anyone.
Make-Ahead Friendly: This dessert actually gets better when made in advance.
Great for Leftovers: Slices keep beautifully in the freezer for days.
Insider Tips from the Freezer
Before we jump into the how-to, here are a few chef-style tips that make a noticeable difference.
- Slightly soften the ice cream so it spreads easily but does not melt.
- Use a bowl with smooth sides for the cleanest shape.
- Press each layer gently to avoid air pockets.
- Freeze between layers if your kitchen is warm.
Tools You Will Need
A calm kitchen and the right tools make this process smooth from start to finish.
Mixing Bowl: A deep bowl creates the classic bombe shape.
Spatula: Helps spread the ice cream evenly without tearing layers.
Plastic Wrap: Essential for lining and easy unmolding.
Freezer Space: Make sure you have a flat, stable spot ready.
Ingredients You Will Need For This Recipe
What makes this dessert shine is the harmony between simple ingredients working together.
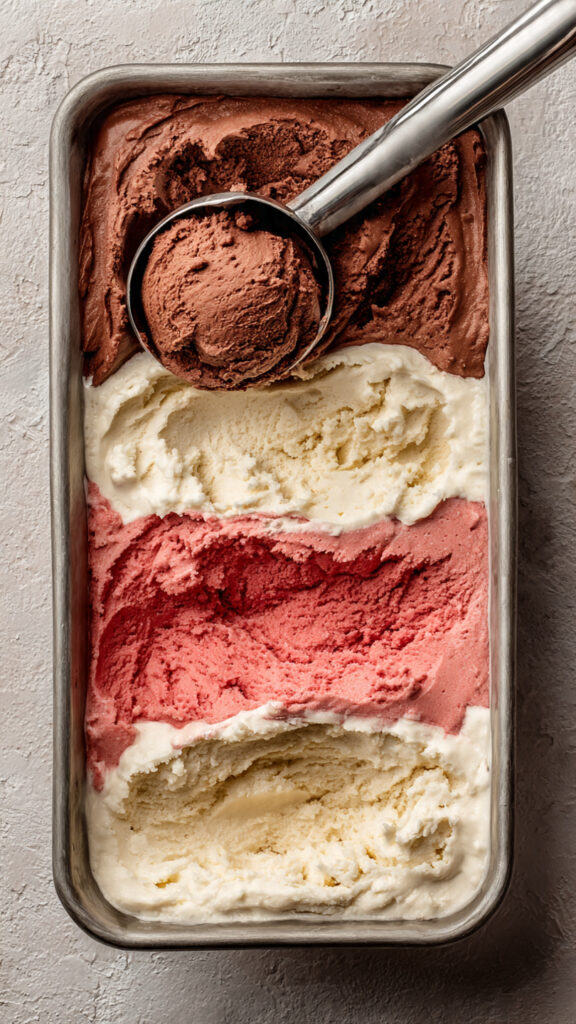
- Chocolate Ice Cream: 500 grams, rich and creamy, forms one bold layer with deep cocoa flavor.
- Vanilla Ice Cream: 500 grams, smooth and mellow, balances the stronger flavors.
- Strawberry Ice Cream: 500 grams, lightly fruity and refreshing, adds brightness and color.
Smart Ingredient Swaps
If you want to play around a little, here are some easy changes that still work beautifully.
Chocolate Ice Cream: Dark chocolate or chocolate fudge swirl.
Vanilla Ice Cream: French vanilla or vanilla bean.
Strawberry Ice Cream: Raspberry or mixed berry.
The Stars of the Show
Sometimes simple ingredients deserve a closer look.
Chocolate Ice Cream: This layer brings richness and depth, grounding the dessert and making every bite feel indulgent.
Strawberry Ice Cream: Light, fruity, and refreshing, it keeps the cake from feeling too heavy.
Let’s Build This Beauty Together
Now let’s dive into the fun part, assembling everything step by step. Take your time here, it is worth every minute.
- Preheat Your Equipment: Clear space in your freezer and place the mixing bowl inside for a few minutes to chill.
- Combine Ingredients: Allow each ice cream flavor to soften slightly at room temperature.
- Prepare Your Cooking Vessel: Line the chilled bowl completely with plastic wrap, leaving overhang.
- Assemble the Dish: Spread the chocolate ice cream evenly in the bottom, then add vanilla, then strawberry, smoothing each layer.
- Cook to Perfection: Cover with plastic wrap and freeze for at least 6 hours until fully firm.
- Finishing Touches: Unmold by lifting the wrap and placing the cake onto a serving plate.
- Serve and Enjoy: Slice with a warm knife and admire those layers.
Texture and Flavor in Every Slice
What makes this dessert so satisfying is the contrast. Each layer is smooth and creamy, yet distinct in flavor. As it softens slightly on the plate, the flavors blend just enough while still keeping their identity. It is cold, rich, light, and refreshing all at once.
Helpful Tips for Best Results
A few extra pointers can really elevate the final result.
- Freeze between layers if you want ultra sharp lines.
- Use a warm knife for cleaner slices.
- Let it sit for 5 minutes before serving for the best texture.
What to Avoid for a Perfect Bombe
Even easy desserts have a few pitfalls, but they are simple to fix.
- Do not use fully melted ice cream, it will refreeze icy.
- Avoid rushing the freezing time.
- Do not skip the plastic wrap, it is key for unmolding.
Nutrition Facts at a Glance
Servings: 10
Calories per serving: 280
Note: These are approximate values.
Time Breakdown Made Simple
Prep Time: 20 minutes
Cook Time: 0 minutes
Total Time: 6 hours 20 minutes
Make-Ahead and Storage Tips
This dessert loves planning ahead. You can make it up to three days in advance and keep it tightly wrapped in the freezer. Leftover slices should be wrapped individually to prevent freezer burn. No reheating needed, just a short rest at room temperature.
Serving Ideas That Feel Special
Serve slices on chilled plates with a few fresh berries on the side or a drizzle of warm chocolate sauce. Even on its own, it feels festive and complete.
Creative Ways to Use Leftovers
Leftover slices can be chopped and layered into parfait glasses or blended slightly for thick milkshakes. It is a great way to stretch the joy a little longer.
Extra Tips for a Smooth Experience
If your freezer runs warm, place the bowl inside a larger container for extra insulation. And always label your layers if you are experimenting with new flavors.
Make It a Real Showstopper
For presentation, wipe the serving plate clean and add a simple garnish just before serving. Clean edges and visible layers do most of the visual work for you.
Fun Variations to Try Next Time
- Add a crushed cookie layer between ice creams.
- Swirl fruit puree into the strawberry layer.
- Use all chocolate variations for a rich twist.
- Add a thin vanilla center for extra contrast.
FAQ’s
1. Can I make this without a bowl?
Yes, a loaf pan works, but the shape will be different.
2. How long should it sit before slicing?
About 5 minutes at room temperature is ideal.
3. Can I refreeze leftovers?
Yes, as long as they stay properly wrapped.
4. Will this melt quickly when serving?
It holds well for about 15 minutes in a cool room.
5. Can kids help make this?
Absolutely, layering is simple and fun.
6. Is it very sweet?
It is balanced, especially with the strawberry layer.
7. Can I add crunch?
Yes, thin cookie layers work nicely.
8. Does it need a sauce?
Not at all, but it pairs well with chocolate sauce.
9. How do I get clean slices?
Use a warm knife and wipe between cuts.
10. Is it worth making ahead?
Let me tell you, it is worth every bite.
Conclusion
This Neapolitan Christmas bombe ice-cream cake proves that holiday desserts do not need to be complicated to feel special. It is simple, nostalgic, and quietly impressive, the kind of treat people remember long after the plates are cleared. Give it a try and enjoy the smiles it brings to your table.
Print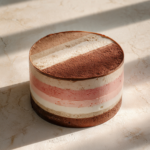
Neapolitan Christmas Bombe Ice-Cream Cake
- Prep Time: 20 minutes
- Cook Time: 0 minutes
- Total Time: 6 hours 20 minutes
- Yield: 10 servings
- Category: Dessert
- Method: Freezing
- Cuisine: Italian-inspired
- Diet: Vegetarian
Description
A festive frozen dessert made with layered chocolate, vanilla, and strawberry ice cream, shaped into a classic bombe and perfect for holiday celebrations.
Ingredients
- Chocolate ice cream – 500 grams
- Vanilla ice cream – 500 grams
- Strawberry ice cream – 500 grams
Instructions
- Clear space in the freezer and chill a deep mixing bowl for a few minutes.
- Let all ice cream flavors sit at room temperature until slightly softened.
- Line the chilled bowl completely with plastic wrap, leaving extra overhang.
- Spread the chocolate ice cream evenly into the bottom of the bowl.
- Add the vanilla ice cream layer, smoothing gently.
- Finish with the strawberry ice cream layer and level the top.
- Cover with plastic wrap and freeze for at least 6 hours until firm.
- Unmold onto a serving plate by lifting the plastic wrap.
- Slice with a warm knife and serve.
Notes
- Freeze briefly between layers for sharper definition.
- Use a warm knife for clean slices.
- Let sit 5 minutes before serving for best texture.
Nutrition
- Serving Size: 1 slice
- Calories: 280
- Sugar: 24 g
- Sodium: 90 mg
- Fat: 14 g
- Saturated Fat: 9 g
- Unsaturated Fat: 4 g
- Trans Fat: 0 g
- Carbohydrates: 34 g
- Fiber: 1 g
- Protein: 4 g
- Cholesterol: 45 mg