
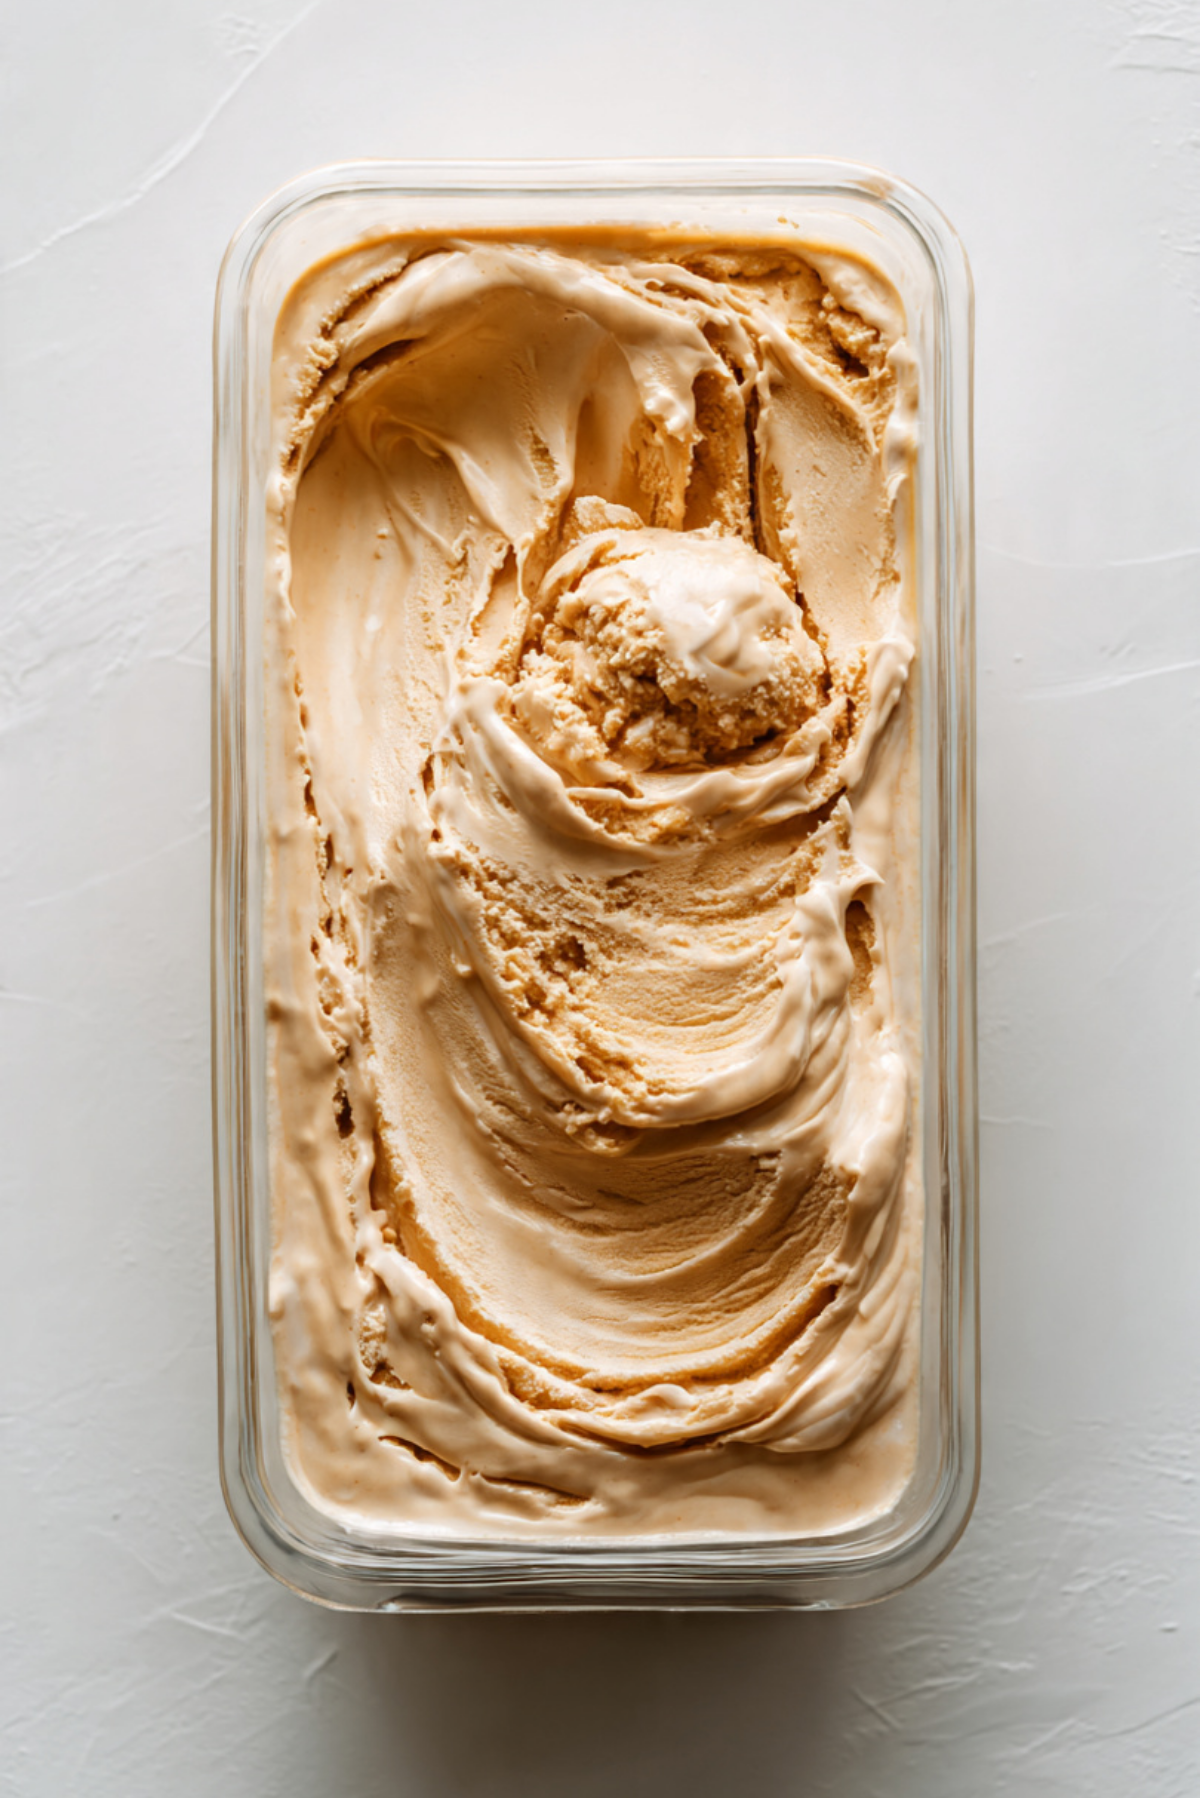
There is something almost magical about pulling a homemade ice cream out of the freezer, scooping into it, and seeing those thick ribbons of cookie butter swirled through a creamy base. This Cookie Butter No-Churn Ice Cream is rich, smooth, and packed with that warm spiced cookie flavor we all secretly crave. Trust me, you’re going to love this. It is sweet, slightly caramelized, perfectly creamy, and let me tell you, it’s worth every spoonful.
The Creamy Dream Dessert That Needs No Machine
The beauty of this recipe is how simple it is. No ice cream maker, no complicated custard base, no constant stirring. Just whip, fold, swirl, and freeze. The result is a velvety texture that rivals store bought ice cream.
Cookie butter brings notes of cinnamon, brown sugar, and warm spice into the mix, creating a dessert that feels cozy and indulgent at the same time. And now let’s talk about where this irresistible spread came from.
The Story Behind Cookie Butter’s Rise to Fame
Cookie butter originated from crushed spiced cookies blended into a creamy spread. Inspired by traditional European speculoos cookies, it quickly became popular worldwide for its unique flavor.
Naturally, creative bakers started adding it to cheesecakes, brownies, and of course ice cream. This no churn version keeps things simple while delivering maximum flavor.
Now let’s look at why this recipe works every single time.
Why This Recipe Is Completely Reliable
Before we start whipping, here is why this dessert deserves a place in your freezer.
Versatile: Serve in cones, bowls, or between cookies.
Budget-Friendly: Only a handful of ingredients required.
Quick and Easy: Just 10 minutes of prep.
Customizable: Add extra swirls or mix in crushed cookies.
Crowd-Pleasing: Cookie butter lovers will be obsessed.
Make-Ahead Friendly: Perfect for preparing ahead of gatherings.
Great for Leftovers: Stays creamy and scoopable for days.
Now let’s make sure you get that perfect creamy texture.
Pro Tips for Ultra Creamy No-Churn Ice Cream
A few small tricks make a big difference.
- Use very cold heavy cream for better whipping.
- Whip to stiff peaks but do not overwhip.
- Fold gently to maintain airiness.
- Freeze in a shallow container for even chilling.
With that in mind, let’s gather your tools.
Essential Tools for Easy Preparation
Keeping it simple makes dessert stress free.
Large Mixing Bowl: For whipping the cream.
Hand Mixer or Stand Mixer: Helps achieve stiff peaks quickly.
Spatula: For gentle folding.
Loaf Pan or Freezer Safe Container: For freezing the mixture.
Now let’s talk about ingredients.
Ingredients You Will Need For This Recipe
Each ingredient contributes to that smooth creamy finish.
- Heavy Cream: 2 cups, cold, creates airy structure.
- Sweetened Condensed Milk: 1 can, 14 ounces, provides sweetness and smooth texture.
- Cookie Butter: 1 cup, plus 1/4 cup for swirling, adds signature spiced flavor.
- Vanilla Extract: 1 teaspoon, enhances overall sweetness.
- Salt: 1/8 teaspoon, balances flavors.
Now that everything is ready, let’s explore substitutions.
Easy Ingredient Swaps
This recipe adapts easily.
Cookie Butter: Use chocolate hazelnut spread for a different twist.
Vanilla Extract: Almond extract adds subtle warmth.
Salt: Optional, but recommended for flavor balance.
Now let’s spotlight the star ingredient.
The Spread That Makes It Irresistible
Cookie Butter: This creamy spiced spread is the heart of the dessert. It delivers warm cinnamon notes and caramelized sweetness that define the flavor.
Alright, let’s make it.
Let’s Make It Step by Step
Take a deep breath and let’s whip it up.
- Preheat Your Equipment: No heat needed, but chill your mixing bowl if possible.
- Combine Ingredients: In a large bowl, whip heavy cream to stiff peaks.
- Prepare Your Cooking Vessel: In another bowl, mix sweetened condensed milk, 1 cup cookie butter, vanilla extract, and salt until smooth.
- Assemble the Dish: Gently fold whipped cream into the cookie butter mixture until fully combined.
- Cook to Perfection: Since this is no churn, focus on folding gently to maintain fluffiness.
- Finishing Touches: Transfer mixture to a loaf pan and swirl remaining 1/4 cup cookie butter on top using a knife.
- Serve and Enjoy: Freeze for at least 6 hours or until firm, then scoop and serve.
Texture and Flavor That Feels Like Pure Comfort
The final texture is smooth, creamy, and slightly airy. The sweetened condensed milk keeps it soft and scoopable, while the cookie butter adds deep spiced sweetness. The swirls create pockets of intense flavor in every bite.
Helpful Tips for Best Results
- Do not overmix when folding.
- Press plastic wrap directly onto the surface before freezing.
- Let sit at room temperature for 5 minutes before scooping.
What to Avoid for Perfect Creaminess
- Overwhipping cream can cause grainy texture.
- Skipping the swirl reduces flavor contrast.
- Freezing in a deep container may require longer freezing time.
Nutrition Snapshot
Servings: 8
Calories per serving: 410
Note: These are approximate values.
Preparation Time Overview
Prep Time: 10 minutes
Cook Time: 0 minutes
Total Time: 10 minutes plus freezing
Make Ahead and Storage Tips
Store tightly covered in the freezer for up to 2 weeks. Keep plastic wrap pressed against the surface to reduce ice crystals.
Serving Suggestions for Maximum Indulgence
Serve in waffle cones or bowls. Drizzle with melted cookie butter. Top with crushed cookies for crunch.
Creative Leftover Transformations
Sandwich between cookies for ice cream sandwiches. Blend into milkshakes. Spoon over brownies for a decadent dessert.
Additional Tips for Extra Flavor
Add a pinch of cinnamon for extra warmth. Swirl in melted chocolate for contrast. This one’s a total game changer for cookie lovers.
Make It Look Stunning
Create dramatic swirls on top before freezing. Scoop into clear bowls to show off the ribbons of cookie butter.
Variations to Try
Add crushed spiced cookies into the base. Swirl in caramel sauce. Mix in mini chocolate chips for texture.
FAQ’s
Q1: Can I make this without condensed milk?
Sweetened condensed milk is essential for texture in this version.
Q2: Can I use light cream?
Heavy cream works best for structure.
Q3: How long does it take to freeze?
At least 6 hours for firm texture.
Q4: Can I double the recipe?
Yes, use a larger container.
Q5: Is it very sweet?
It is rich and sweet, but balanced with salt.
Q6: Can I add mix ins?
Yes, fold them in gently before freezing.
Q7: Why whip to stiff peaks?
It creates air and creamy texture.
Q8: Can I reduce sugar?
Reducing condensed milk may affect texture.
Q9: Does it get icy?
Properly covered, it stays smooth.
Q10: Can I make it dairy free?
You would need alternative cream and condensed milk substitutes.
Conclusion
Cookie Butter No-Churn Ice Cream proves that you do not need fancy equipment to make something truly special. Creamy, spiced, and beautifully swirled, it delivers comfort in every scoop. Once you try it, it may just become your go to freezer treat.
Print
Cookie Butter No-Churn Ice Cream
- Prep Time: 10 minutes
- Cook Time: 0 minutes
- Total Time: 10 minutes plus freezing
- Yield: 8 servings
- Category: Dessert
- Method: No-Churn
- Cuisine: American
- Diet: Vegetarian
Description
Ultra creamy cookie butter no-churn ice cream swirled with extra ribbons of spiced cookie butter. Rich, smooth, and incredibly easy to make with just a handful of ingredients.
Ingredients
- 2 cups heavy cream, cold
- 1 can (14 ounces) sweetened condensed milk
- 1 cup cookie butter
- 1/4 cup cookie butter for swirling
- 1 teaspoon vanilla extract
- 1/8 teaspoon salt
Instructions
- Chill your mixing bowl if possible before starting.
- In a large bowl, whip the cold heavy cream to stiff peaks using a hand mixer or stand mixer.
- In a separate bowl, mix together sweetened condensed milk, 1 cup cookie butter, vanilla extract, and salt until smooth.
- Gently fold the whipped cream into the cookie butter mixture until fully combined and airy.
- Transfer the mixture into a loaf pan or freezer safe container.
- Warm the remaining 1/4 cup cookie butter slightly if needed, then drizzle over the top.
- Use a knife to create swirls throughout the ice cream.
- Cover with plastic wrap pressed directly onto the surface.
- Freeze for at least 6 hours or until firm.
- Let sit at room temperature for 5 minutes before scooping and serving.
Notes
- Whip cream to stiff peaks but avoid overwhipping to prevent grainy texture.
- Fold gently to keep the mixture light and airy.
- Store tightly covered in the freezer for up to 2 weeks.
Nutrition
- Serving Size: 1 serving
- Calories: 410
- Sugar: 30g
- Sodium: 160mg
- Fat: 30g
- Saturated Fat: 19g
- Unsaturated Fat: 9g
- Trans Fat: 0g
- Carbohydrates: 32g
- Fiber: 0g
- Protein: 5g
- Cholesterol: 90mg