
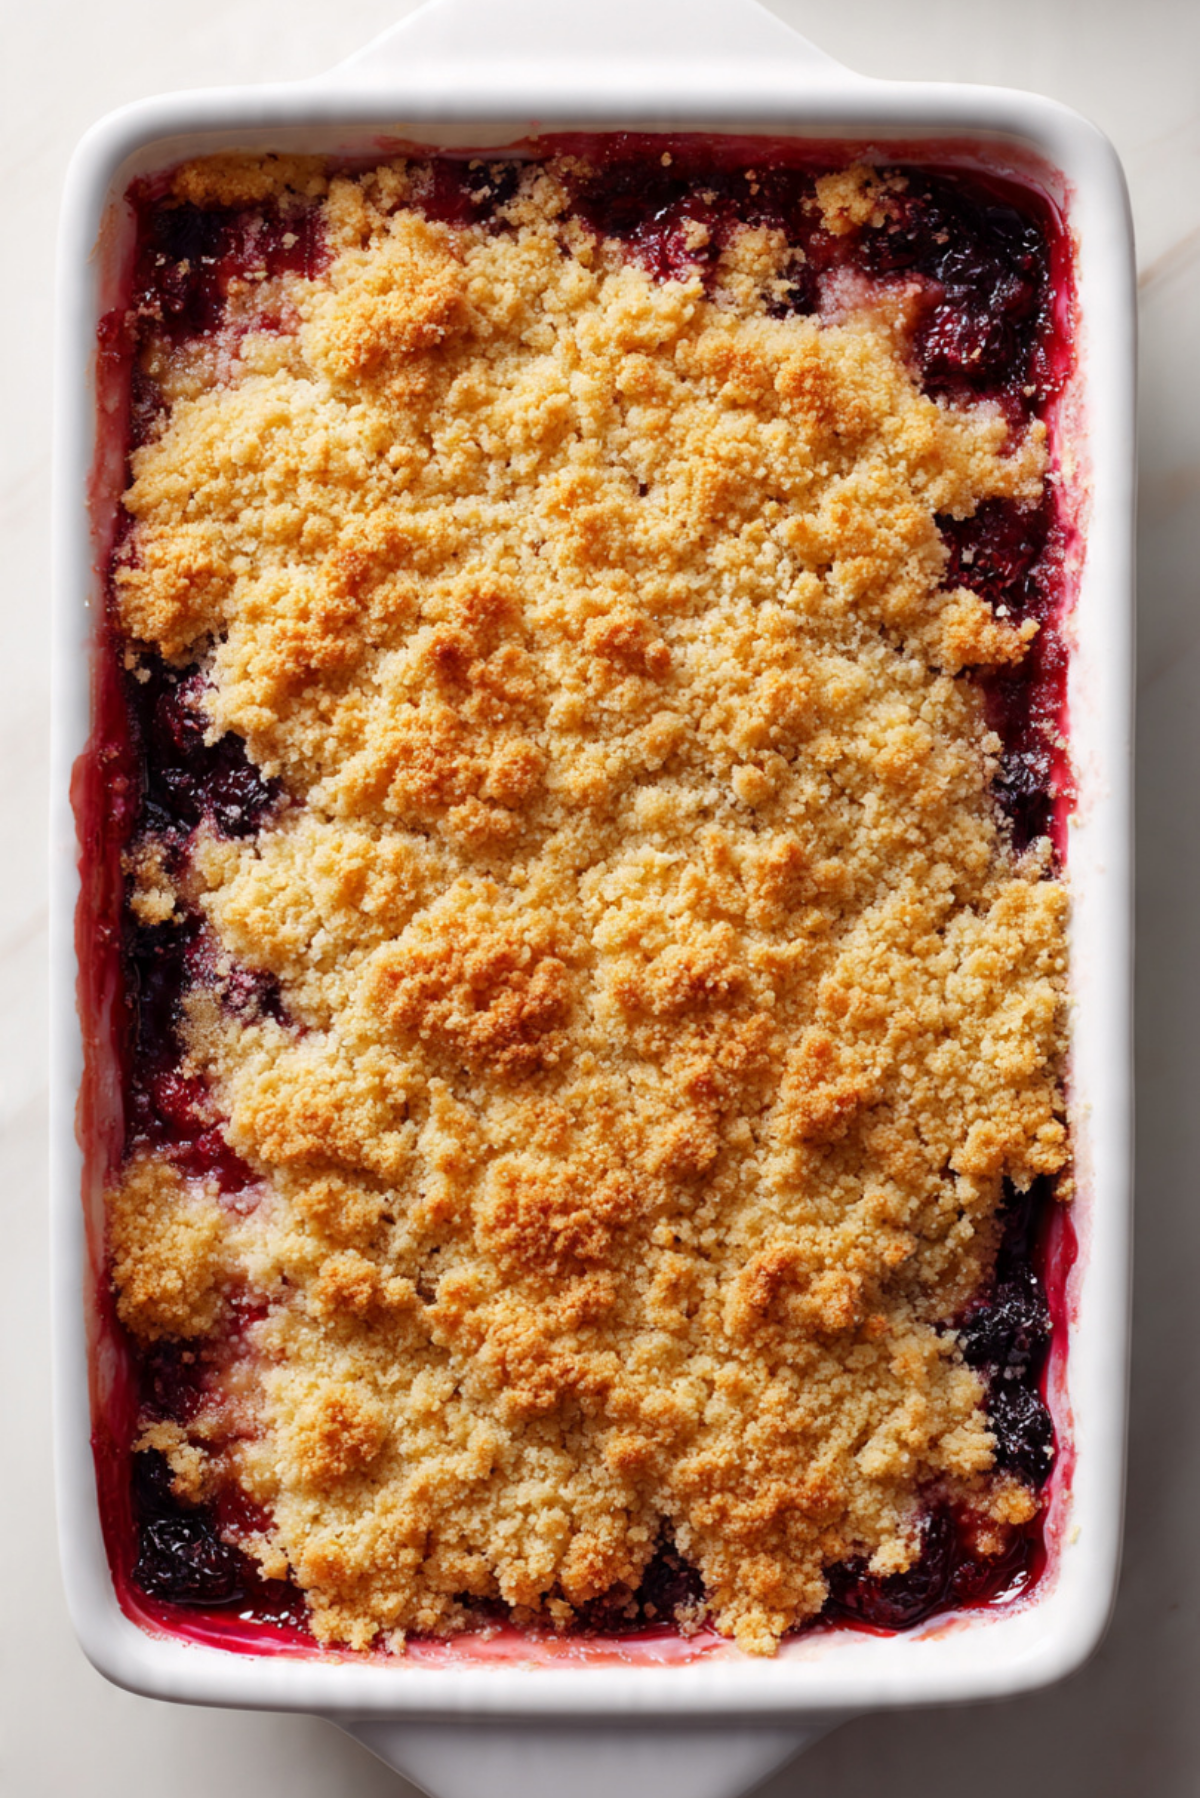
Some desserts are fancy and layered and require careful timing. And then there are desserts like this one, the kind you can throw together in minutes and still have everyone asking for seconds. Berry Crisp Dump Cake is exactly that kind of magic. Trust me, you’re going to love this.
It is warm, buttery, bursting with juicy berries, and topped with a golden crisp layer that feels like a shortcut crumble. The best part is that you do not need a mixer, multiple bowls, or complicated steps. You simply layer, bake, and wait for that incredible aroma to fill the kitchen.
Why This Easy Dessert Works Every Time
The beauty of a dump cake is in its simplicity. The fruit forms a jammy base as it bakes, while dry cake mix and butter transform into a crisp golden topping.
As it cooks, the butter melts into the cake mix, creating pockets of crunch and soft cake like texture all in one pan. This one’s a total game changer for busy days or last minute guests.
A Classic Shortcut Worth Keeping
Dump cakes became popular because they deliver homemade flavor with minimal effort. Instead of mixing a traditional batter, you layer ingredients directly into the baking dish.
This berry version takes that classic idea and gives it a bright, fruity twist that feels perfect for any season.
Why You Will Make This Again and Again
Before we preheat the oven, here is why this recipe deserves a permanent place in your collection.
Incredibly Easy: No mixing required.
Versatile: Works with fresh or frozen berries.
Crowd-Pleasing: Sweet, tart, and buttery in every bite.
Budget-Friendly: Simple pantry staples.
Make-Ahead Friendly: Reheats beautifully.
Customizable: Add nuts or oats for extra crunch.
Perfect for Gatherings: Feeds a crowd with minimal effort.
Pro Tips for the Best Texture
A few small details make a big difference.
- Spread cake mix evenly over the fruit.
- Slice butter thinly for even coverage.
- Do not stir the layers.
- Bake until the top is deeply golden.
Essential Kitchen Tools
You only need a few basics.
9×13 Inch Baking Dish: Ideal for even baking.
Spatula: To spread fruit evenly.
Knife: For slicing butter.
Oven: The real work happens here.
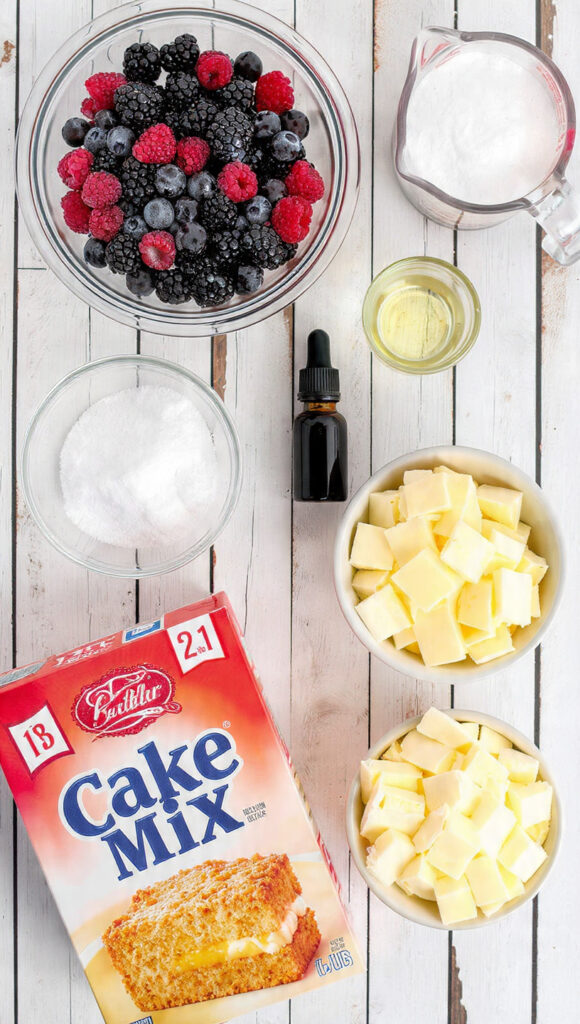
Ingredients You Will Need For This Berry Crisp Dump Cake
Each ingredient plays its role in building flavor and texture.
- Mixed Berries: 6 cups, fresh or frozen. Provide juicy tart sweetness.
- Granulated Sugar: 1/2 cup. Enhances the fruit flavor.
- Lemon Juice: 1 tablespoon. Brightens the berries.
- Vanilla Extract: 1 teaspoon. Adds warmth.
- Yellow Cake Mix: 1 box, about 15 ounces. Creates the topping.
- Unsalted Butter: 1/2 cup, thinly sliced. Forms the crisp golden layer.
Optional additions:
- Old Fashioned Oats: 1/2 cup. Adds texture.
- Chopped Pecans: 1/3 cup. For nutty crunch.
Ingredient Swaps
Mixed Berries: Use blueberries, raspberries, strawberries, or a combination.
Yellow Cake Mix: White cake mix works as well.
Butter: Use salted butter if preferred, reduce added sugar slightly.
Spotlight on the Stars
Mixed Berries: They create the jammy, vibrant base that makes this dessert shine.
Cake Mix: The shortcut ingredient that transforms into a buttery crisp topping.
Let’s Bake
Now that everything is ready, let’s layer and bake.
- Preheat Your Equipment: Preheat oven to 350 degrees Fahrenheit.
- Combine Ingredients: In a bowl, toss mixed berries with granulated sugar, lemon juice, and vanilla extract.
- Prepare Your Cooking Vessel: Spread the berry mixture evenly into a 9×13 inch baking dish.
- Assemble the Dish: Sprinkle dry cake mix evenly over the berries without stirring. Arrange thin slices of butter evenly across the top. Add oats or pecans if using.
- Cook to Perfection: Bake for 45 to 50 minutes, until the top is golden brown and the filling is bubbling around the edges.
- Finishing Touches: Let cool for at least 15 minutes to allow filling to thicken slightly.
- Serve and Enjoy: Serve warm, optionally with vanilla ice cream.
Texture and Flavor Experience
The topping is crisp and buttery with golden edges, while underneath the berries bubble into a thick, glossy filling. You get sweet, tart, and rich all at once. Let me tell you, it’s worth every bite.
Helpful Tips
- If using frozen berries, do not thaw first.
- Place baking dish on a sheet pan to catch drips.
- Bake until deeply golden for best crunch.
- Allow resting time before serving.
What to Avoid
- Stirring the layers together.
- Using large chunks of butter instead of thin slices.
- Underbaking, which leaves dry patches.
- Skipping resting time.
Nutrition Facts
Servings: 10
Calories per serving: 340
Note: These are approximate values.
Preparation Time
Prep Time: 10 minutes
Cook Time: 50 minutes
Total Time: 1 hour
Make-Ahead and Storage Tips
Store covered in the refrigerator for up to four days. Reheat in the oven to restore crispness.
You can also freeze leftovers for up to two months. Thaw overnight and warm before serving.
How to Serve
Serve warm with a scoop of vanilla ice cream or a dollop of whipped cream. Pair with coffee for a cozy dessert.
Creative Variations
Add shredded coconut to the topping.
Mix cinnamon into the cake mix.
Use only blueberries for a deep purple version.
Drizzle with a simple vanilla glaze.
Additional Tips
Taste your berries before adding sugar. Adjust sweetness if needed. Always spread the cake mix evenly.
Make It a Showstopper
Serve directly from a white baking dish so the golden top contrasts with the deep berry filling. Add a scoop of ice cream right before serving so it melts gently into the warm fruit.
FAQ’s
Q1: Can I use frozen berries?
Yes, use them straight from the freezer.
Q2: Why is my topping dry?
Butter may not have covered evenly.
Q3: Can I reduce sugar?
Yes, depending on berry sweetness.
Q4: Do I need to mix the cake mix with butter first?
No, sprinkle dry and layer butter on top.
Q5: Can I make it gluten free?
Use a gluten free cake mix.
Q6: How do I know it is done?
The top should be golden and fruit bubbling.
Q7: Can I double the recipe?
Yes, use a larger baking dish.
Q8: Should it be refrigerated?
Yes, if storing longer than one day.
Q9: Can I add spices?
Cinnamon or nutmeg work well.
Q10: Can I prepare it ahead?
Yes, assemble and refrigerate before baking.
Conclusion
Berry Crisp Dump Cake is the kind of dessert that feels effortless yet completely satisfying. With its golden buttery topping and juicy berry filling, it delivers bold flavor with minimal work. This one’s a total game changer for easy crowd pleasing desserts.
Print
Berry Crisp Dump Cake
- Prep Time: 10 minutes
- Cook Time: 50 minutes
- Total Time: 1 hour
- Yield: 10 servings
- Category: Dessert
- Method: Baking
- Cuisine: American
- Diet: Vegetarian
Description
An easy Berry Crisp Dump Cake layered with juicy mixed berries and topped with a golden buttery cake mix crust. Sweet, slightly tart, and perfect served warm with a scoop of ice cream.
Ingredients
- 6 cups mixed berries, fresh or frozen
- 1/2 cup granulated sugar
- 1 tablespoon lemon juice
- 1 teaspoon vanilla extract
- 1 box yellow cake mix, about 15 ounces
- 1/2 cup unsalted butter, thinly sliced
- 1/2 cup old fashioned oats, optional
- 1/3 cup chopped pecans, optional
Instructions
- Preheat oven to 350 degrees Fahrenheit.
- In a large bowl, toss mixed berries with granulated sugar, lemon juice, and vanilla extract until evenly coated.
- Spread the berry mixture evenly into a 9×13 inch baking dish.
- Sprinkle the dry yellow cake mix evenly over the berries without stirring.
- Arrange thin slices of butter evenly across the top of the cake mix, covering as much surface area as possible.
- If using, sprinkle old fashioned oats and chopped pecans over the top.
- Bake for 45 to 50 minutes, until the topping is golden brown and the filling is bubbling around the edges.
- Let cool for at least 15 minutes before serving to allow the filling to thicken slightly.
- Serve warm and enjoy.
Notes
- Do not stir the layers once assembled.
- If using frozen berries, do not thaw before baking.
- Slice butter thinly for even browning.
- Store leftovers covered in the refrigerator for up to 4 days.
Nutrition
- Serving Size: 1 serving
- Calories: 340
- Sugar: 32g
- Sodium: 320mg
- Fat: 14g
- Saturated Fat: 8g
- Unsaturated Fat: 5g
- Trans Fat: 0g
- Carbohydrates: 52g
- Fiber: 3g
- Protein: 3g
- Cholesterol: 30mg