
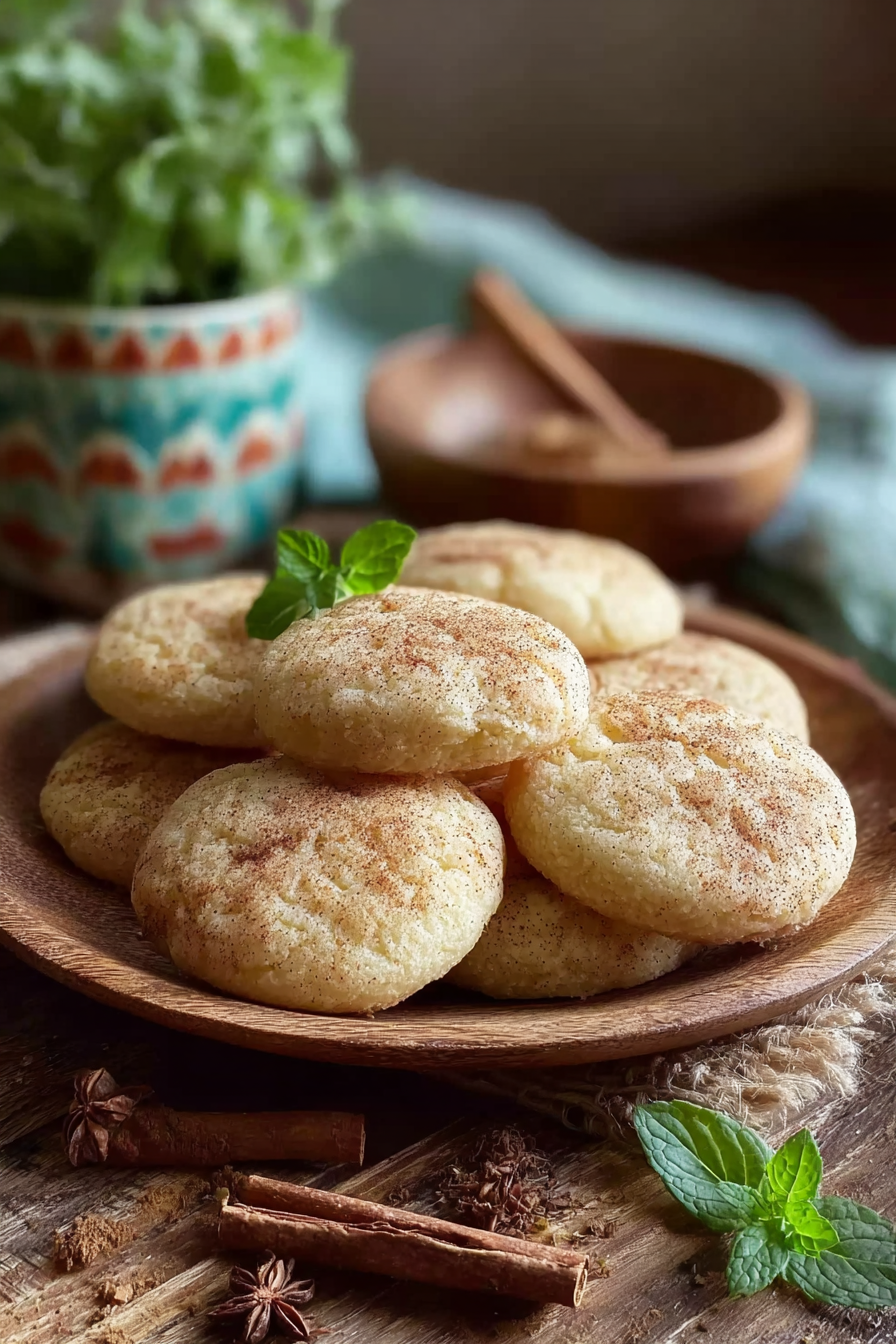
There’s something so comforting about a plate of freshly baked Old Fashioned Tea Cakes, still warm from the oven. The soft, buttery aroma fills the kitchen, wrapping you in a sense of nostalgia that feels like a hug from the past. These tender, lightly sweet cookies are the kind that make you think of cozy afternoons, a cup of tea, and laughter shared around the kitchen table.
Behind the Recipe
Old Fashioned Tea Cakes have a story that begins in the heart of Southern kitchens. They were the kind of treat your grandmother made when guests came over or when the kids needed something special after school. Simple ingredients like butter, sugar, and flour came together to create something truly timeless. The beauty of this recipe lies in its simplicity, a sweet reminder that some of the best things in life are made from the heart.
Recipe Origin or Trivia
These tea cakes trace their roots back to early American settlers who adapted European tea biscuits to local ingredients. Unlike modern cookies, they were never too sweet, making them perfect companions for a cup of tea or coffee. Over generations, every family gave them their own twist—some added nutmeg, others a touch of vanilla, and a few even sprinkled sugar on top for extra charm.
Why You’ll Love Old Fashioned Tea Cakes
This recipe is pure comfort. Here’s why it’ll quickly become one of your favorites:
Versatile: Perfect with tea, coffee, or even a glass of milk.
Budget-Friendly: Uses pantry staples you likely already have at home.
Quick and Easy: Comes together in under an hour from start to finish.
Customizable: Add spices, zest, or icing if you’re feeling creative.
Crowd-Pleasing: Everyone loves these soft, buttery classics.
Make-Ahead Friendly: The dough can chill for days before baking.
Great for Leftovers: They stay soft for days, perfect for lunchbox treats.
Chef’s Pro Tips for Perfect Results
Baking these to perfection is all about the little touches.
- Always use room-temperature butter for the best texture.
- Don’t overmix the dough; it should feel soft, not sticky.
- Chill the dough for at least 30 minutes for even baking.
- Bake on parchment paper to prevent sticking and promote even browning.
- Let them cool completely before storing to keep their texture perfect.
Kitchen Tools You’ll Need
Before you start, gather a few essential tools to make your baking smoother.
- Mixing Bowls: For creaming butter and combining dry ingredients.
- Electric Mixer: Helps achieve that fluffy butter-sugar mixture.
- Rolling Pin: To gently flatten the dough.
- Biscuit Cutter or Glass: To shape those classic round tea cakes.
- Baking Sheet: Preferably light-colored for even browning.
- Cooling Rack: Ensures your tea cakes cool without becoming soggy.
Ingredients in Old Fashioned Tea Cakes
There’s a beautiful harmony in these simple ingredients that come together to form a soft, delicate cookie.
- Butter: 1 cup (softened). Brings richness and tenderness.
- Granulated Sugar: 1 cup. Adds sweetness and helps with browning.
- Eggs: 2 large. Bind the dough and add lightness.
- All-Purpose Flour: 3 cups. Provides structure and shape.
- Baking Powder: 1 teaspoon. Adds lift to the cookies.
- Salt: 1/2 teaspoon. Balances the sweetness.
- Vanilla Extract: 1 teaspoon. Adds warmth and depth of flavor.
- Milk: 2 tablespoons. Keeps the dough soft and easy to roll.
Ingredient Substitutions
Because sometimes you just need to make do with what’s on hand.
- Butter: Use margarine for a lighter texture.
- Milk: Swap with almond or oat milk for a dairy-free version.
- Vanilla Extract: Try almond extract for a nutty twist.
- All-Purpose Flour: Substitute with gluten-free flour for dietary needs.
Ingredient Spotlight
Butter: The soul of these tea cakes, giving them their melt-in-your-mouth texture and rich flavor.
Vanilla Extract: The warm aroma that ties everything together, adding a nostalgic bakery scent to every bite.
Instructions for Making Old Fashioned Tea Cakes
Alright, now let’s dive into baking these beauties.
- Preheat Your Equipment: Set your oven to 350°F (175°C) and line a baking sheet with parchment paper.
- Combine Ingredients: Cream the butter and sugar until fluffy. Add eggs and vanilla, mixing well.
- Prepare Your Cooking Vessel: In another bowl, whisk together flour, baking powder, and salt. Gradually mix into the butter mixture, adding milk last.
- Assemble the Dish: Roll out the dough on a lightly floured surface and cut out circles using a cookie cutter or glass.
- Cook to Perfection: Place on the baking sheet and bake for 8–10 minutes until the edges turn lightly golden.
- Finishing Touches: Cool on a rack before serving or storing.
- Serve and Enjoy: Pour yourself a cup of tea and enjoy these nostalgic treats.
Texture & Flavor Secrets
The magic lies in their simplicity. The edges have a delicate crispness, while the center stays soft and tender. The buttery sweetness lingers just long enough to make you crave another bite, and that hint of vanilla brings warmth with every chew.
Cooking Tips & Tricks
Here are a few small touches that make a big difference:
- Chill the dough for a firmer texture.
- Dust your cutter with flour to prevent sticking.
- Add a pinch of nutmeg for a classic Southern flavor.
- Bake a test batch to check your ideal baking time.
What to Avoid
Even experienced bakers can slip up, so here’s what to watch for:
- Don’t overbake; they’ll lose their softness.
- Avoid overmixing the dough; it can make them tough.
- Don’t skip chilling; it helps maintain shape.
Nutrition Facts
Servings: 24
Calories per serving: Approximately 140
Note: These are approximate values.
Preparation Time
Prep Time: 15 minutes
Cook Time: 10 minutes
Total Time: 25 minutes
Make-Ahead and Storage Tips
These cookies are perfect for planning ahead. The dough can be made up to 3 days in advance and kept chilled. Once baked, store in an airtight container for up to a week. To freeze, place the cooled cookies in layers with parchment paper between them. Reheat briefly for that fresh-baked taste.
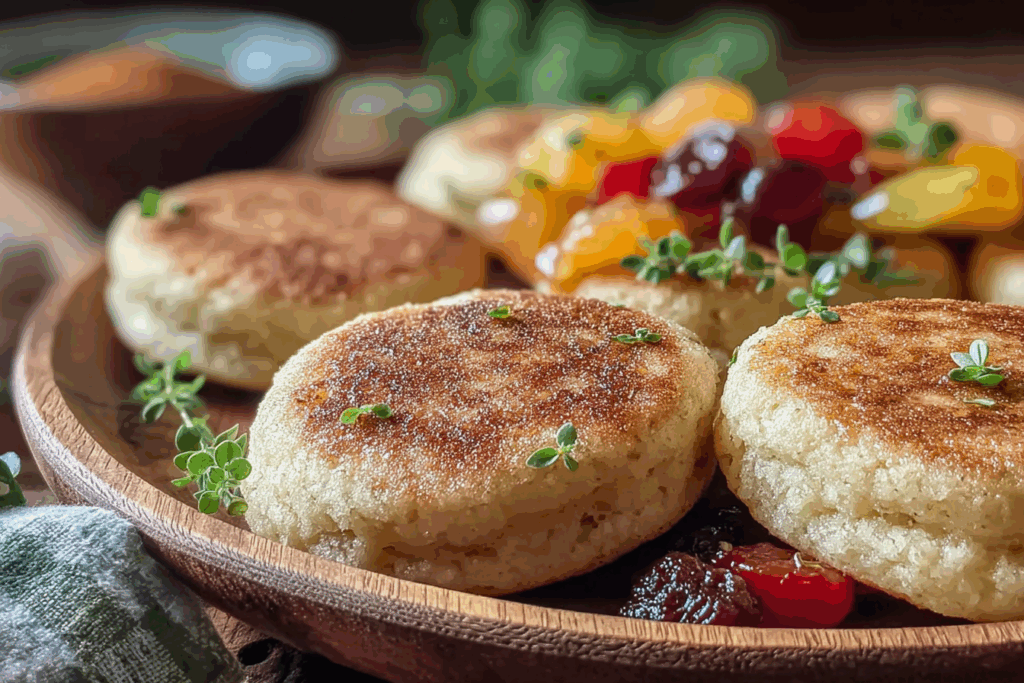
How to Serve Old Fashioned Tea Cakes
Serve them warm with afternoon tea or coffee. They’re also lovely dusted with powdered sugar or paired with fresh fruit and whipped cream for a simple dessert plate.
Creative Leftover Transformations
If you have leftovers (which might be rare!), crumble them over vanilla ice cream, sandwich them with frosting, or dip them halfway in chocolate for a new twist.
Additional Tips
For an extra burst of flavor, add a touch of lemon zest or sprinkle sugar on top before baking. If you love softer cookies, reduce baking time by one minute.
Make It a Showstopper
Serve them on a vintage platter with lace napkins and a pot of tea. The rustic simplicity and golden color will charm everyone at the table.
Variations to Try
- Add cinnamon and nutmeg for a spiced holiday version.
- Mix in dried cranberries or raisins for a fruity twist.
- Top with a simple glaze of milk and powdered sugar.
- Substitute half the flour with whole wheat for a heartier bite.
- Roll in coarse sugar for a sparkly finish.
FAQ’s
Q1: Can I freeze Old Fashioned Tea Cakes?
Yes, they freeze beautifully. Store them in an airtight container and thaw at room temperature before serving.
Q2: Can I use brown sugar instead of white sugar?
You can, but it will give a slightly different flavor and darker color.
Q3: Do I need to refrigerate the dough?
Yes, at least 30 minutes helps the cookies hold their shape.
Q4: How do I know when they’re done?
The edges should be just golden, and the centers should look slightly soft.
Q5: Can I make them gluten-free?
Absolutely, use a 1:1 gluten-free baking blend.
Q6: Are these supposed to be soft or crunchy?
They should be tender with lightly crisp edges.
Q7: What’s the best way to store them?
Keep in an airtight container at room temperature for up to a week.
Q8: Can I use salted butter?
Yes, just skip adding extra salt to the recipe.
Q9: Can I double this recipe?
Yes, just make sure to chill the dough between batches.
Q10: What’s the origin of the name “tea cakes”?
They were traditionally served with tea during afternoon gatherings.
Conclusion
Old Fashioned Tea Cakes are a sweet slice of nostalgia, the kind that fills your kitchen with warmth and your heart with memories. They’re simple, soft, and utterly timeless. So go ahead, preheat that oven, and bake a batch of these golden beauties. Trust me, you’re going to love every buttery bite.
Print
Old Fashioned Tea Cakes
- Prep Time: 15 minutes
- Cook Time: 10 minutes
- Total Time: 25 minutes
- Yield: 24 cookies
- Category: Dessert
- Method: Baking
- Cuisine: American
- Diet: Vegetarian
Description
Soft, buttery, and lightly sweet, these Old Fashioned Tea Cakes are the kind of nostalgic treat that brings warmth and comfort to any afternoon. Perfect with tea, coffee, or even a glass of milk, they’re a timeless favorite passed down through generations.
Ingredients
- 1 cup butter, softened
- 1 cup granulated sugar
- 2 large eggs
- 3 cups all-purpose flour
- 1 teaspoon baking powder
- 1/2 teaspoon salt
- 1 teaspoon vanilla extract
- 2 tablespoons milk
Instructions
- Preheat the oven to 350°F (175°C) and line a baking sheet with parchment paper.
- Cream together the butter and sugar until light and fluffy.
- Add eggs and vanilla extract, mixing until fully incorporated.
- In a separate bowl, whisk together flour, baking powder, and salt.
- Gradually add the dry ingredients to the butter mixture, adding milk last to create a soft dough.
- Roll out the dough on a lightly floured surface and cut into circles using a cookie cutter or glass.
- Place the cutouts on the baking sheet and bake for 8–10 minutes until lightly golden on the edges.
- Cool completely on a wire rack before serving or storing.
Notes
- Chill the dough for 30 minutes before rolling for easier handling.
- Add a pinch of nutmeg or lemon zest for extra flavor.
- Store in an airtight container for up to a week or freeze for longer shelf life.
Nutrition
- Serving Size: 1 cookie
- Calories: 140
- Sugar: 9g
- Sodium: 80mg
- Fat: 7g
- Saturated Fat: 4g
- Unsaturated Fat: 2g
- Trans Fat: 0g
- Carbohydrates: 17g
- Fiber: 0g
- Protein: 2g
- Cholesterol: 25mg