
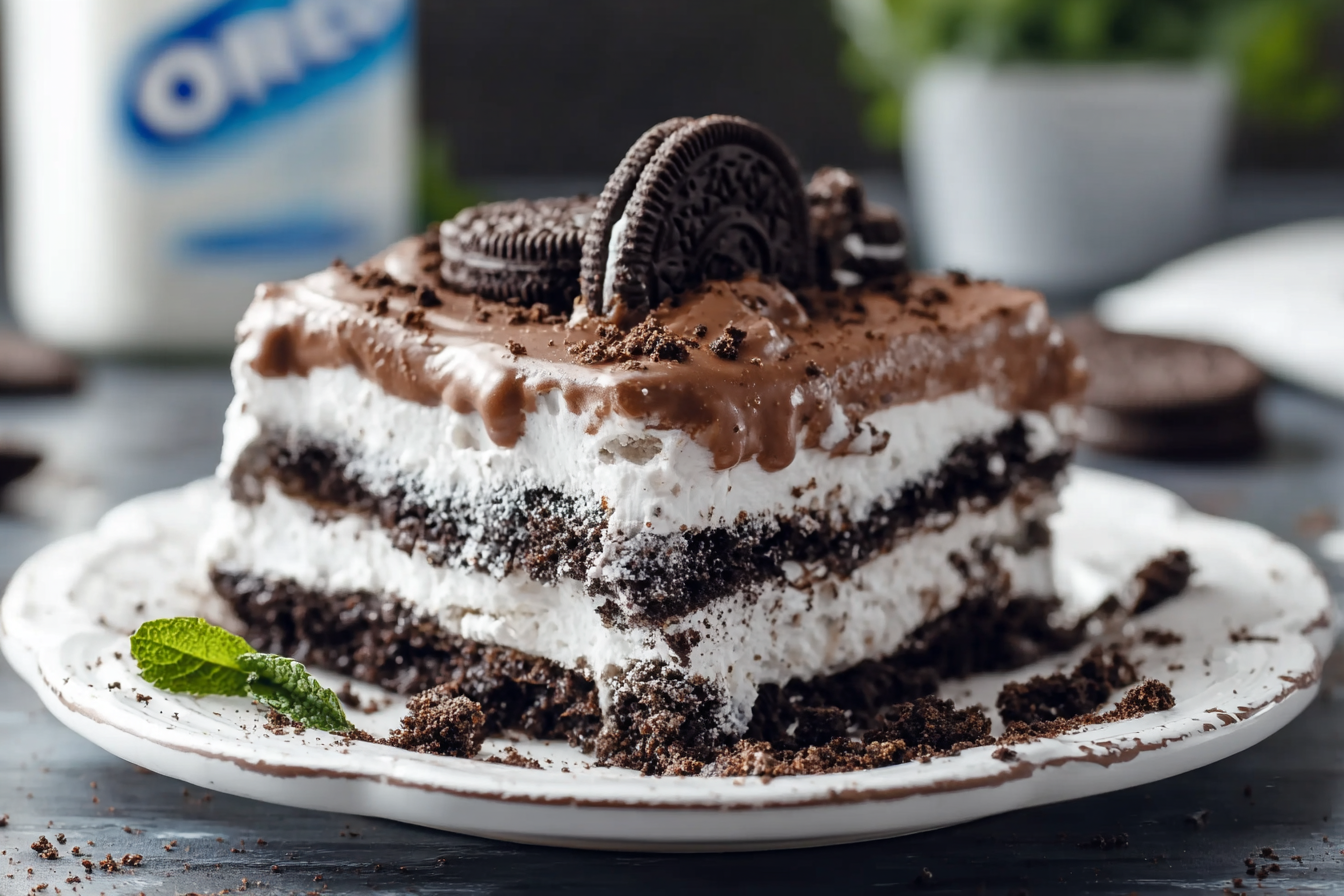
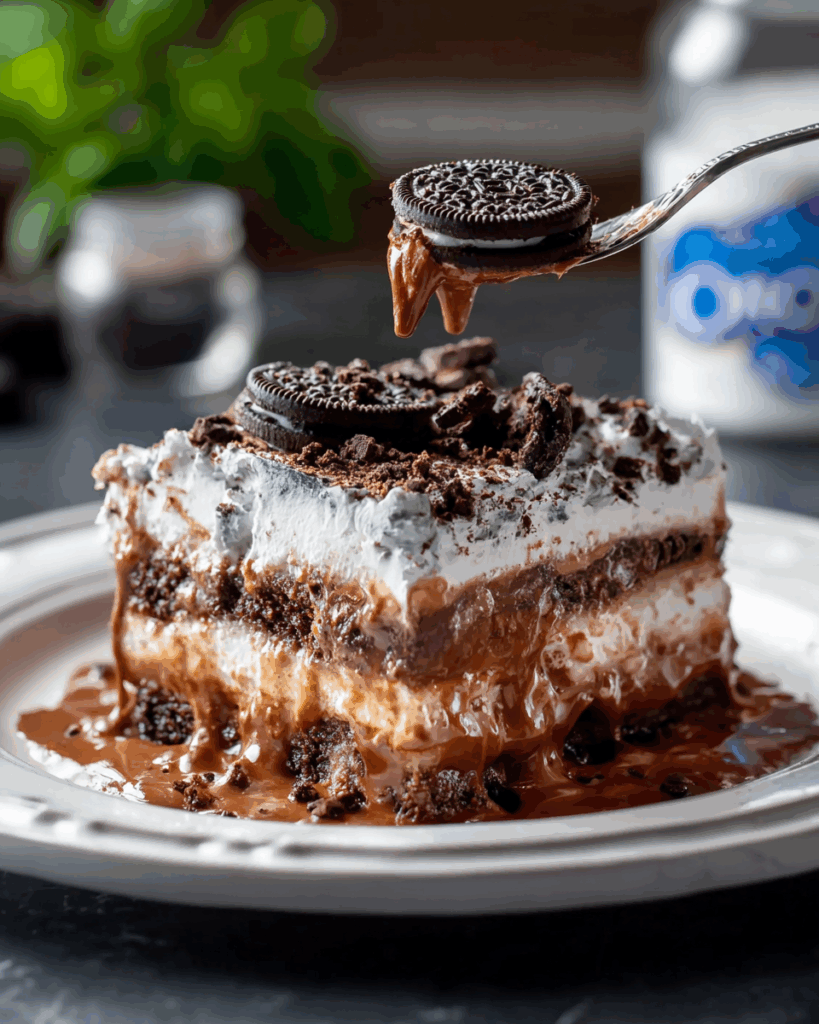
If you’re a fan of Oreos, creamy layers, and no-bake magic, you need this Layered Oreo Dessert in your life. It’s cool, it’s creamy, it’s chocolatey—and it’s the kind of dessert that makes people sneak back for seconds (and thirds). Imagine a buttery Oreo crust, smooth cream cheese filling, velvety chocolate pudding, and fluffy whipped topping—all stacked up into one irresistible spoonful.
Whether you’re bringing dessert to a party or just want something sweet and simple to satisfy your cravings, this one’s always a hit. It’s basically cookies and cream in layered form, and trust me—it disappears fast!
Why You’ll Love This Recipe
- No baking required—just mix, layer, and chill
- Layers of creamy, chocolatey deliciousness
- Family-friendly, potluck-perfect, and kid-approved
- Can be made ahead of time for stress-free serving
- Customizable with extra toppings like crushed Oreos or drizzle
Ingredients
For the Crust
- 1 package (about 36 cookies) Oreo cookies, finely crushed
- ½ cup unsalted butter, melted
For the Cream Cheese Layer
- 8 oz cream cheese, softened
- 1 cup powdered sugar
- 1 container (8 oz) whipped topping (like Cool Whip), thawed
For the Pudding Layer
- 1 package (5.1 oz) instant chocolate pudding mix
- 2¾ cups cold milk
For the Topping
- 1 container (8 oz) whipped topping, thawed
- Extra crushed Oreos or mini Oreos for garnish (optional)
Instructions
Step 1: Make the Crust
In a bowl, mix the crushed Oreos with melted butter until combined. Press firmly into the bottom of a 9×13-inch dish to form a crust. Chill in the fridge while you prep the layers.
Step 2: Make the Cream Cheese Layer
In a large bowl, beat together the softened cream cheese and powdered sugar until smooth. Fold in one container of whipped topping. Spread this mixture evenly over the chilled Oreo crust.
Step 3: Prepare the Pudding Layer
In a separate bowl, whisk the chocolate pudding mix and cold milk for about 2 minutes, until thickened. Spread over the cream cheese layer.
Step 4: Add the Whipped Topping
Spread the remaining container of whipped topping over the pudding layer. Smooth it out with a spatula.
Step 5: Garnish and Chill
Sprinkle extra crushed Oreos or mini Oreos on top if you’re feeling extra! Chill for at least 4 hours (or overnight) before serving so the layers can set.
Tips for the Best Layered Oreo Dessert
- Use a food processor for extra fine cookie crumbs
- Chill between layers if you want extra clean lines
- Make it ahead—it’s even better the next day!
- Want to switch it up? Use vanilla pudding, peanut butter Oreos, or a drizzle of hot fudge
FAQs
Can I use double-stuffed Oreos?
Absolutely! Just note the crust might be a bit softer—still totally delicious.
Can I freeze this dessert?
Yes, but let it thaw for 15–20 minutes before serving so it’s not too firm.
What other toppings can I use?
Try chocolate shavings, sprinkles, or a drizzle of caramel or chocolate sauce for an extra treat.
Conclusion
This Layered Oreo Dessert is one of those desserts that looks impressive, tastes even better, and requires barely any effort. It’s rich, creamy, and packed with that classic cookies-and-cream flavor everyone loves. Whether it’s a holiday, birthday, or just a weeknight craving, this recipe is always the right choice.
Print
Layered Oreo Dessert
- Prep Time: 20 minutes
- Cook Time: 0 minutes
- Total Time: 4 hours 20 minutes (including chilling)
- Yield: 12 servings 1x
- Category: Dessert
- Method: No-Bake
- Cuisine: American
- Diet: Vegetarian
Description
Layered Oreo Dessert is an irresistible, no-bake treat made with crushed Oreos, a fluffy cream cheese layer, rich chocolate pudding, and a cloud of whipped topping. It’s cool, creamy, and perfect for potlucks, holidays, or any time you’re craving something sweet and indulgent!
Ingredients
- 1 package (14 oz) Oreo cookies, crushed
- 1/2 cup unsalted butter, melted
- 1 package (8 oz) cream cheese, softened
- 1 cup powdered sugar
- 1 container (8 oz) whipped topping (like Cool Whip), thawed
- 2 packages (3.9 oz each) instant chocolate pudding mix
- 3 cups cold milk
- Additional crushed Oreos or chocolate shavings for garnish (optional)
Instructions
- Reserve 1/2 cup of crushed Oreos for topping. In a bowl, mix the remaining crushed Oreos with melted butter. Press mixture firmly into the bottom of a 9×13-inch baking dish to form the crust. Chill while preparing next layer.
- In another bowl, beat the cream cheese and powdered sugar until smooth. Fold in half of the whipped topping. Spread evenly over the Oreo crust.
- In a separate bowl, whisk the pudding mix and milk until thickened (about 2 minutes). Spread over the cream cheese layer.
- Top with remaining whipped topping and sprinkle with reserved crushed Oreos or chocolate shavings.
- Chill in the refrigerator for at least 4 hours or until set. Slice and serve cold.
Notes
- For a flavor twist, use golden Oreos or swap in vanilla or peanut butter pudding.
- This dessert can be made 1–2 days ahead—just keep chilled and covered.
- Use full-fat ingredients for the creamiest texture.
Nutrition
- Serving Size: 1 slice
- Calories: 340
- Sugar: 27g
- Sodium: 320mg
- Fat: 20g
- Saturated Fat: 10g
- Unsaturated Fat: 8g
- Trans Fat: 0g
- Carbohydrates: 35g
- Fiber: 1g
- Protein: 4g
- Cholesterol: 35mg