
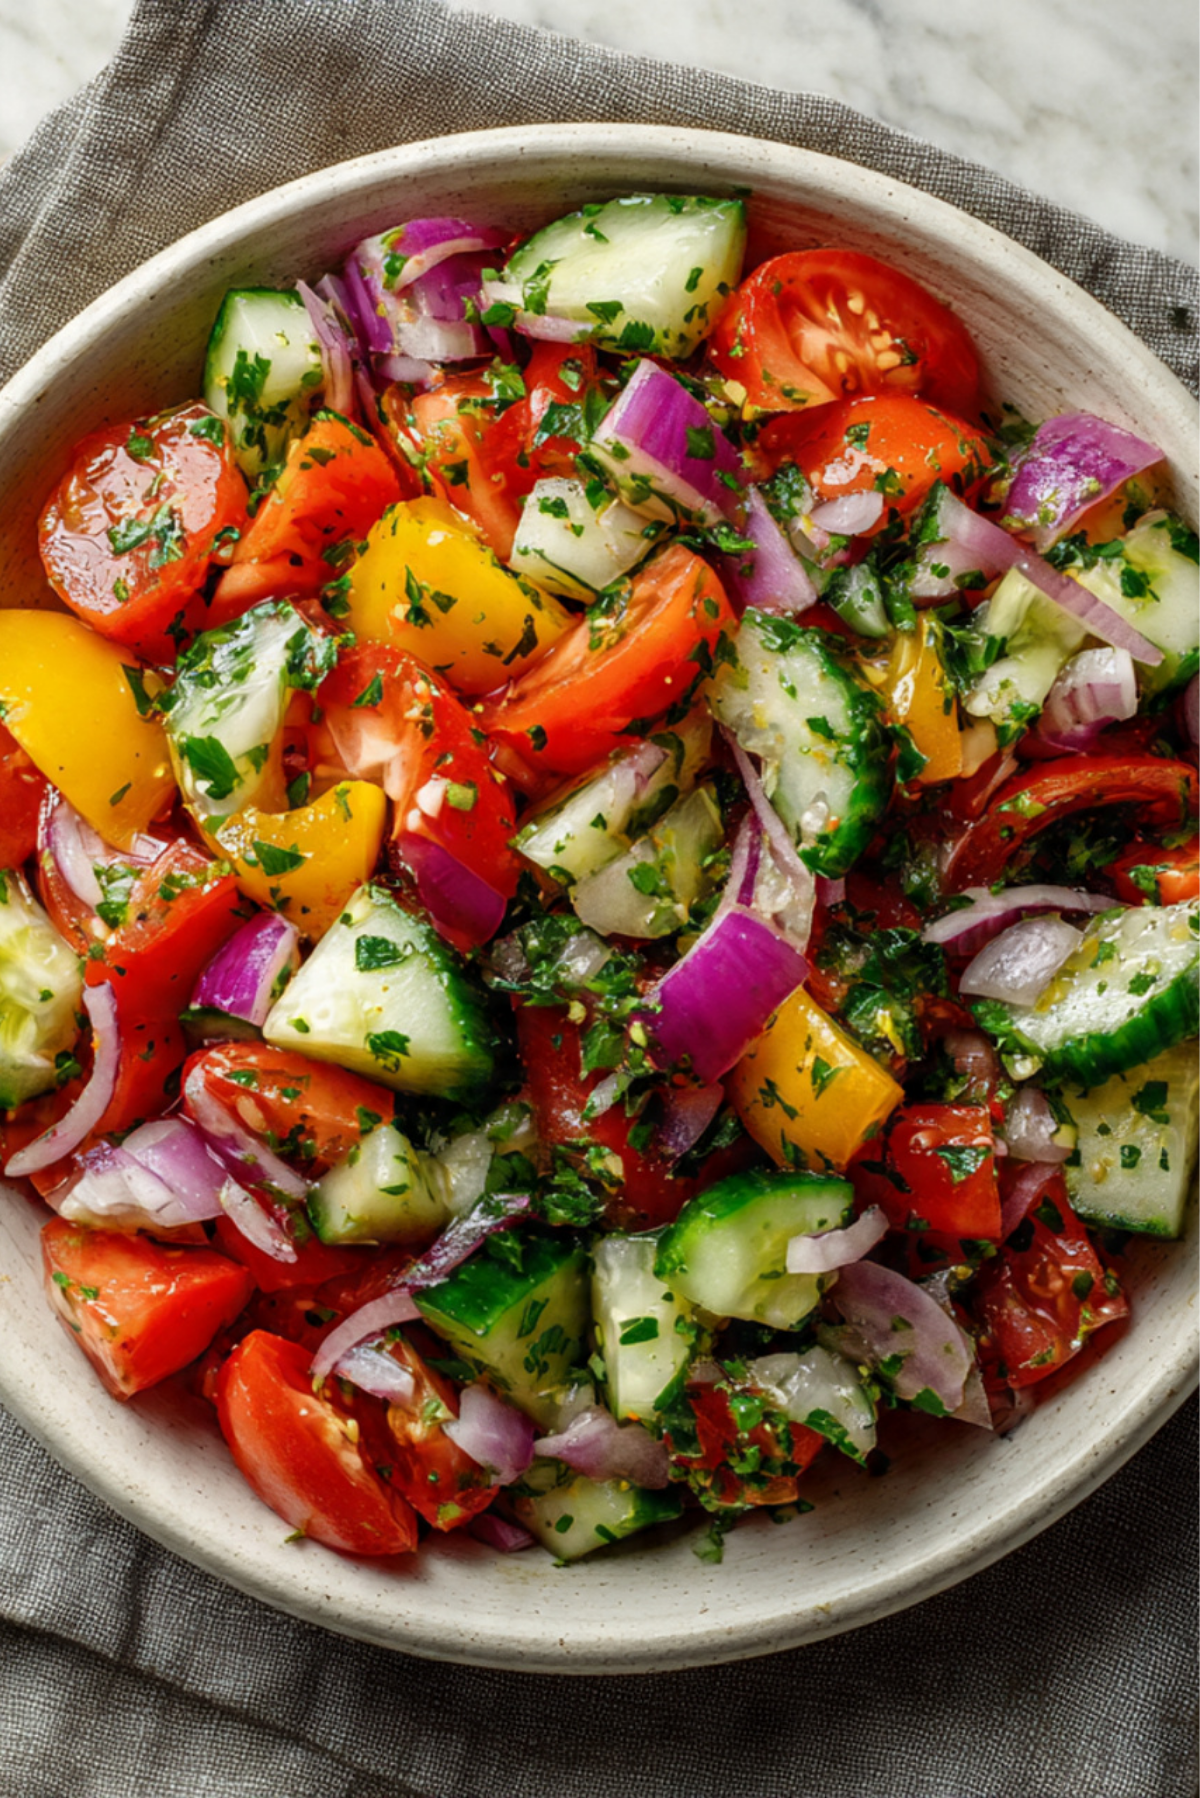
There’s something beautifully simple and refreshing about a bowl of Israeli Salad. With its crisp textures, bright colors, and zesty flavor, it’s the kind of dish that feels like sunshine in a bowl. Whether you’re serving it alongside grilled meats, spooning it into pita bread, or just enjoying it with a fork, this salad brings a burst of freshness that lights up any meal.
Behind the Recipe
This salad takes me back to summer afternoons in a sun-drenched kitchen where the cutting board was always full of colorful produce. It’s one of those recipes you can throw together quickly, yet it always manages to impress with its vibrant look and clean taste. I remember learning to make this from a friend who grew up eating it nearly every day. She’d always say, “The secret is in the tiny chop,” and she was right.
Recipe Origin or Trivia
Israeli Salad, also known as Salat Katzutz in Hebrew, has deep roots in Middle Eastern and Mediterranean cuisine. Though it’s become a staple in Israeli households, its origins trace back to the Arabic salads that were part of Palestinian and broader Levantine traditions. What makes Israeli Salad unique is its fine dicing and the absence of lettuce or greens. It’s all about the freshness of the vegetables and the balance between lemon, olive oil, and salt.
Why You’ll Love Israeli Salad
There are so many reasons this salad deserves a spot in your weekly rotation.
Versatile: Serve it with grilled meats, inside wraps, over rice, or even on its own.
Budget-Friendly: Uses simple, accessible ingredients that don’t break the bank.
Quick and Easy: You can whip it up in under 15 minutes with no cooking required.
Customizable: Add chickpeas, feta, avocado, or fresh mint to make it your own.
Crowd-Pleasing: It’s naturally vegan and gluten-free, making it perfect for gatherings.
Make-Ahead Friendly: It tastes even better after sitting for a bit in the fridge.
Great for Leftovers: Stores well and stays crisp for a couple of days.
Chef’s Pro Tips for Perfect Results
Here’s how to bring out the best in every bowl.
- Dice everything super small and uniform. It makes each bite perfectly balanced.
- Use ripe, juicy tomatoes and firm cucumbers for the best texture.
- Chill the salad before serving. It lets the flavors meld beautifully.
- Always add the salt just before serving to keep the veggies crisp.
- A touch of sumac or za’atar can take the flavor to the next level.
Kitchen Tools You’ll Need
You don’t need fancy equipment, just a few basics from your kitchen drawer.
Sharp Chef’s Knife: For clean, even dicing of vegetables.
Cutting Board: A large one will make prep quicker and cleaner.
Mixing Bowl: To toss and mix the salad without spills.
Citrus Juicer: Makes squeezing fresh lemon easier and mess-free.
Salad Spoon or Tongs: For easy serving and tossing.
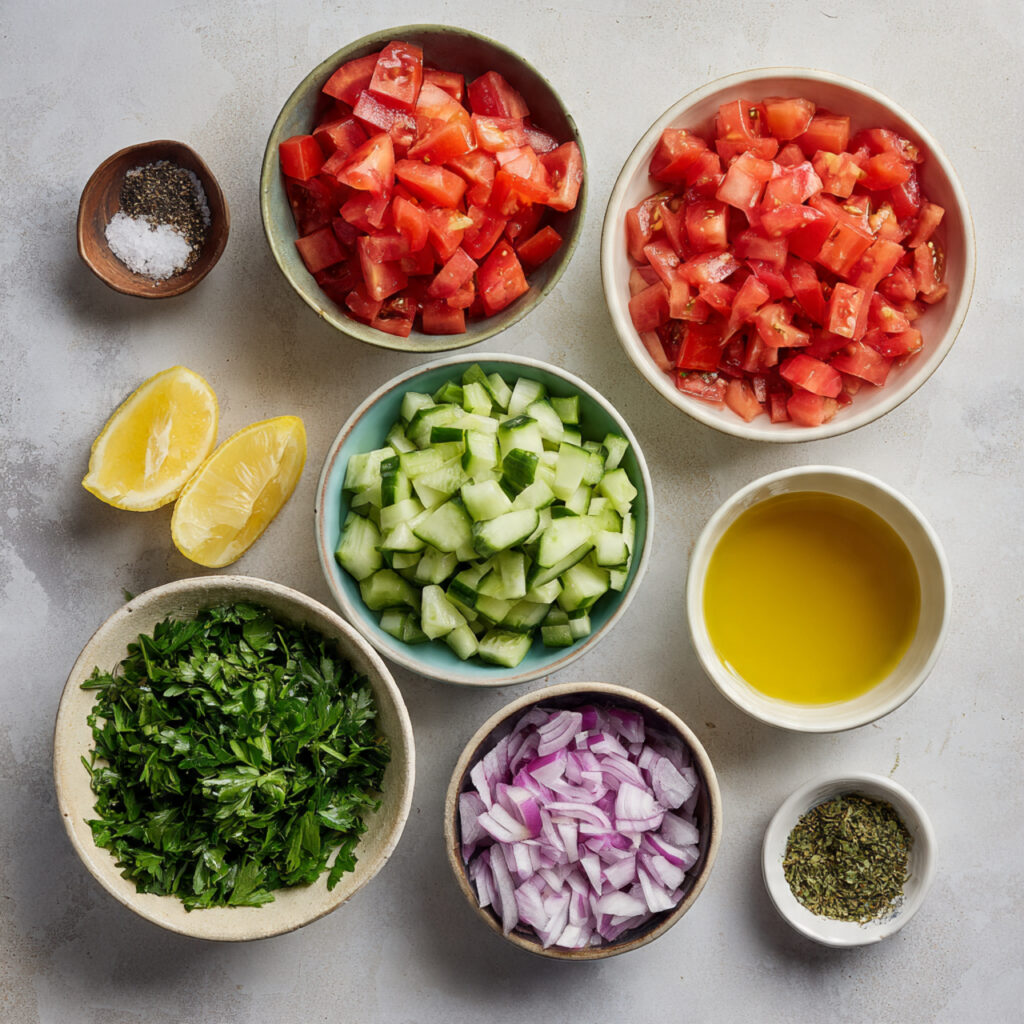
Ingredients in Israeli Salad
Each ingredient has its moment to shine in this crisp and zesty mix.
- Tomatoes: 2 cups finely diced. Brings juiciness, acidity, and bright color.
- Cucumbers: 2 cups finely diced. Adds refreshing crunch and mild flavor.
- Red Onion: 1/2 cup finely diced. Gives a sharp, aromatic bite.
- Fresh Parsley: 1/2 cup finely chopped. Adds a burst of herbal brightness.
- Fresh Lemon Juice: 2 tablespoons. Provides tangy zing that ties it all together.
- Olive Oil: 2 tablespoons. Lends a smooth, rich mouthfeel.
- Salt: 1 teaspoon or to taste. Enhances every other flavor.
- Black Pepper: 1/4 teaspoon. Adds a subtle background spice.
Ingredient Substitutions
Making it your own is easy with these simple swaps.
Cucumbers: English or Persian cucumbers are great, but you can use regular ones if you remove the seeds.
Red Onion: Swap with green onion for a milder flavor.
Parsley: Try fresh cilantro or mint for a twist.
Lemon Juice: White wine vinegar can substitute in a pinch.
Olive Oil: Any neutral oil like avocado oil works if needed.
Ingredient Spotlight
Tomatoes: The star of the show. Their juiciness balances the crisp veggies and soaks up the dressing beautifully.
Fresh Parsley: Often underrated, parsley adds depth, brightness, and a hint of pepperiness that rounds out the salad.
Instructions for Making Israeli Salad
Making Israeli Salad is almost as relaxing as eating it. Here’s how to get from chopping board to table in minutes.
-
Preheat Your Equipment:
No preheating needed here. Just prep your knife and cutting board. -
Combine Ingredients:
In a large mixing bowl, combine the diced tomatoes, cucumbers, red onion, and parsley. -
Prepare Your Cooking Vessel:
Your bowl is your hero here. Make sure it’s large enough to mix everything without spilling. -
Assemble the Dish:
Drizzle in the lemon juice and olive oil. Sprinkle with salt and pepper. -
Cook to Perfection:
Give everything a good, gentle toss until evenly coated. Let it sit for 5–10 minutes if you have time. -
Finishing Touches:
Taste and adjust seasoning if needed. Add more lemon or salt to your liking. -
Serve and Enjoy:
Scoop into bowls or serve family-style. It’s ready to refresh your taste buds.
Texture & Flavor Secrets
Every bite of Israeli Salad offers a satisfying crunch from the cucumbers and onions, balanced by the soft juiciness of the tomatoes. The olive oil coats each piece lightly, while the lemon adds that bright, palate-awakening zing. Together, they form a beautiful harmony of crisp, juicy, tangy, and smooth textures.
Cooking Tips & Tricks
Little adjustments can take your salad from good to unforgettable.
- Use a serrated knife for tomatoes to keep the cuts clean.
- Let the salad rest in the fridge for 10–15 minutes before serving.
- If your tomatoes are very juicy, scoop out the seeds to avoid a watery salad.
What to Avoid
Some common missteps can water down the flavor or texture.
- Using overripe tomatoes which may make the salad soggy.
- Skipping the salt until right before serving. Adding it too early draws out excess moisture.
- Chopping ingredients unevenly, which throws off the texture balance.
Nutrition Facts
Servings: 4
Calories per serving: 110
Note: These are approximate values.
Preparation Time
Prep Time: 15 minutes
Cook Time: 0 minutes
Total Time: 15 minutes
Make-Ahead and Storage Tips
This salad is a make-ahead dream. You can dice all the veggies and store them separately, then toss them with dressing just before serving. Leftovers keep well in an airtight container in the fridge for up to 2 days. Avoid freezing, as it changes the texture of the fresh veggies.
How to Serve Israeli Salad
Israeli Salad is wonderfully versatile. Serve it alongside grilled chicken or falafel, pile it into pita pockets with hummus, or spoon it over warm rice or couscous. You can even enjoy it as a refreshing side for breakfast with eggs and labneh.
Creative Leftover Transformations
Don’t let that extra bowl sit forgotten.
- Mix it into scrambled eggs for a fresh veggie scramble.
- Blend it lightly into a chunky salsa.
- Add to cooked quinoa or bulgur for a hearty lunch bowl.
Additional Tips
For the freshest flavor, use vegetables that are crisp and chilled. Always dry your chopped veggies with a paper towel if they’re too wet. This helps the dressing stick and keeps the salad from going soggy.
Make It a Showstopper
Presentation goes a long way. Serve it in a shallow white bowl to make the colors pop. Garnish with a few parsley leaves or a pinch of za’atar for a touch of artistry. A lemon wedge on the side adds brightness and beauty.
Variations to Try
- Israeli Salad with Feta: Crumbled feta adds creamy, salty contrast.
- Spicy Israeli Salad: Add finely chopped jalapeño or a dash of cayenne.
- Avocado Israeli Salad: Creamy avocado brings richness to the light textures.
- Israeli Couscous Salad: Mix the chopped salad with pearl couscous for a more filling dish.
- Herb Boosted: Mix in dill, mint, or cilantro for more herbal depth.
FAQ’s
Q1: Can I make Israeli Salad ahead of time?
A1: Yes, just keep the dressing separate until serving to maintain the crunch.
Q2: What kind of cucumbers are best?
A2: Persian or English cucumbers work best because they’re seedless and have thin skins.
Q3: Can I add other veggies?
A3: Absolutely. Bell peppers, radishes, or even chopped carrots work great.
Q4: Is this salad vegan?
A4: Yes, it’s naturally vegan.
Q5: Can I use bottled lemon juice?
A5: You can, but fresh lemon juice gives a brighter, cleaner flavor.
Q6: How long does it last in the fridge?
A6: About 2 days, though it’s best fresh.
Q7: Can I freeze Israeli Salad?
A7: No, the vegetables will become mushy when thawed.
Q8: What can I serve this with?
A8: It pairs well with grilled meats, pita, hummus, or even as a light lunch.
Q9: Is it spicy?
A9: Not by default, but you can make it spicy by adding chili.
Q10: Can kids eat this salad?
A10: Yes, it’s kid-friendly and a great way to get veggies in.
Conclusion
Israeli Salad is more than just a side dish. It’s a celebration of freshness, simplicity, and flavor. Whether you’re introducing it to your table for the first time or it’s already a staple, this salad never fails to deliver a crisp, refreshing bite. Trust me, it’s worth every chop.
Print
Israeli Salad
- Prep Time: 15 minutes
- Cook Time: 0 minutes
- Total Time: 15 minutes
- Yield: 4 servings
- Category: Salad
- Method: Chopping
- Cuisine: Middle Eastern
- Diet: Vegan
Description
A refreshing and vibrant Middle Eastern salad made with finely diced tomatoes, cucumbers, onions, parsley, and a zesty lemon-olive oil dressing. Perfect as a side dish or light meal.
Ingredients
- 2 cups finely diced tomatoes
- 2 cups finely diced cucumbers
- 1/2 cup finely diced red onion
- 1/2 cup finely chopped fresh parsley
- 2 tablespoons fresh lemon juice
- 2 tablespoons olive oil
- 1 teaspoon salt
- 1/4 teaspoon black pepper
Instructions
- In a large mixing bowl, combine the diced tomatoes, cucumbers, red onion, and parsley.
- Drizzle in the fresh lemon juice and olive oil.
- Season with salt and black pepper to taste.
- Toss everything gently until the salad is evenly coated.
- Let it sit for 5–10 minutes to allow the flavors to meld.
- Serve chilled or at room temperature.
Notes
- Use a serrated knife for cleaner cuts on tomatoes.
- Add the salt just before serving to keep veggies crisp.
- Customize with avocado, chickpeas, or feta for variety.
- Chill before serving for best flavor.
Nutrition
- Serving Size: 1 cup
- Calories: 110
- Sugar: 4g
- Sodium: 240mg
- Fat: 8g
- Saturated Fat: 1g
- Unsaturated Fat: 7g
- Trans Fat: 0g
- Carbohydrates: 10g
- Fiber: 2g
- Protein: 2g
- Cholesterol: 0mg