
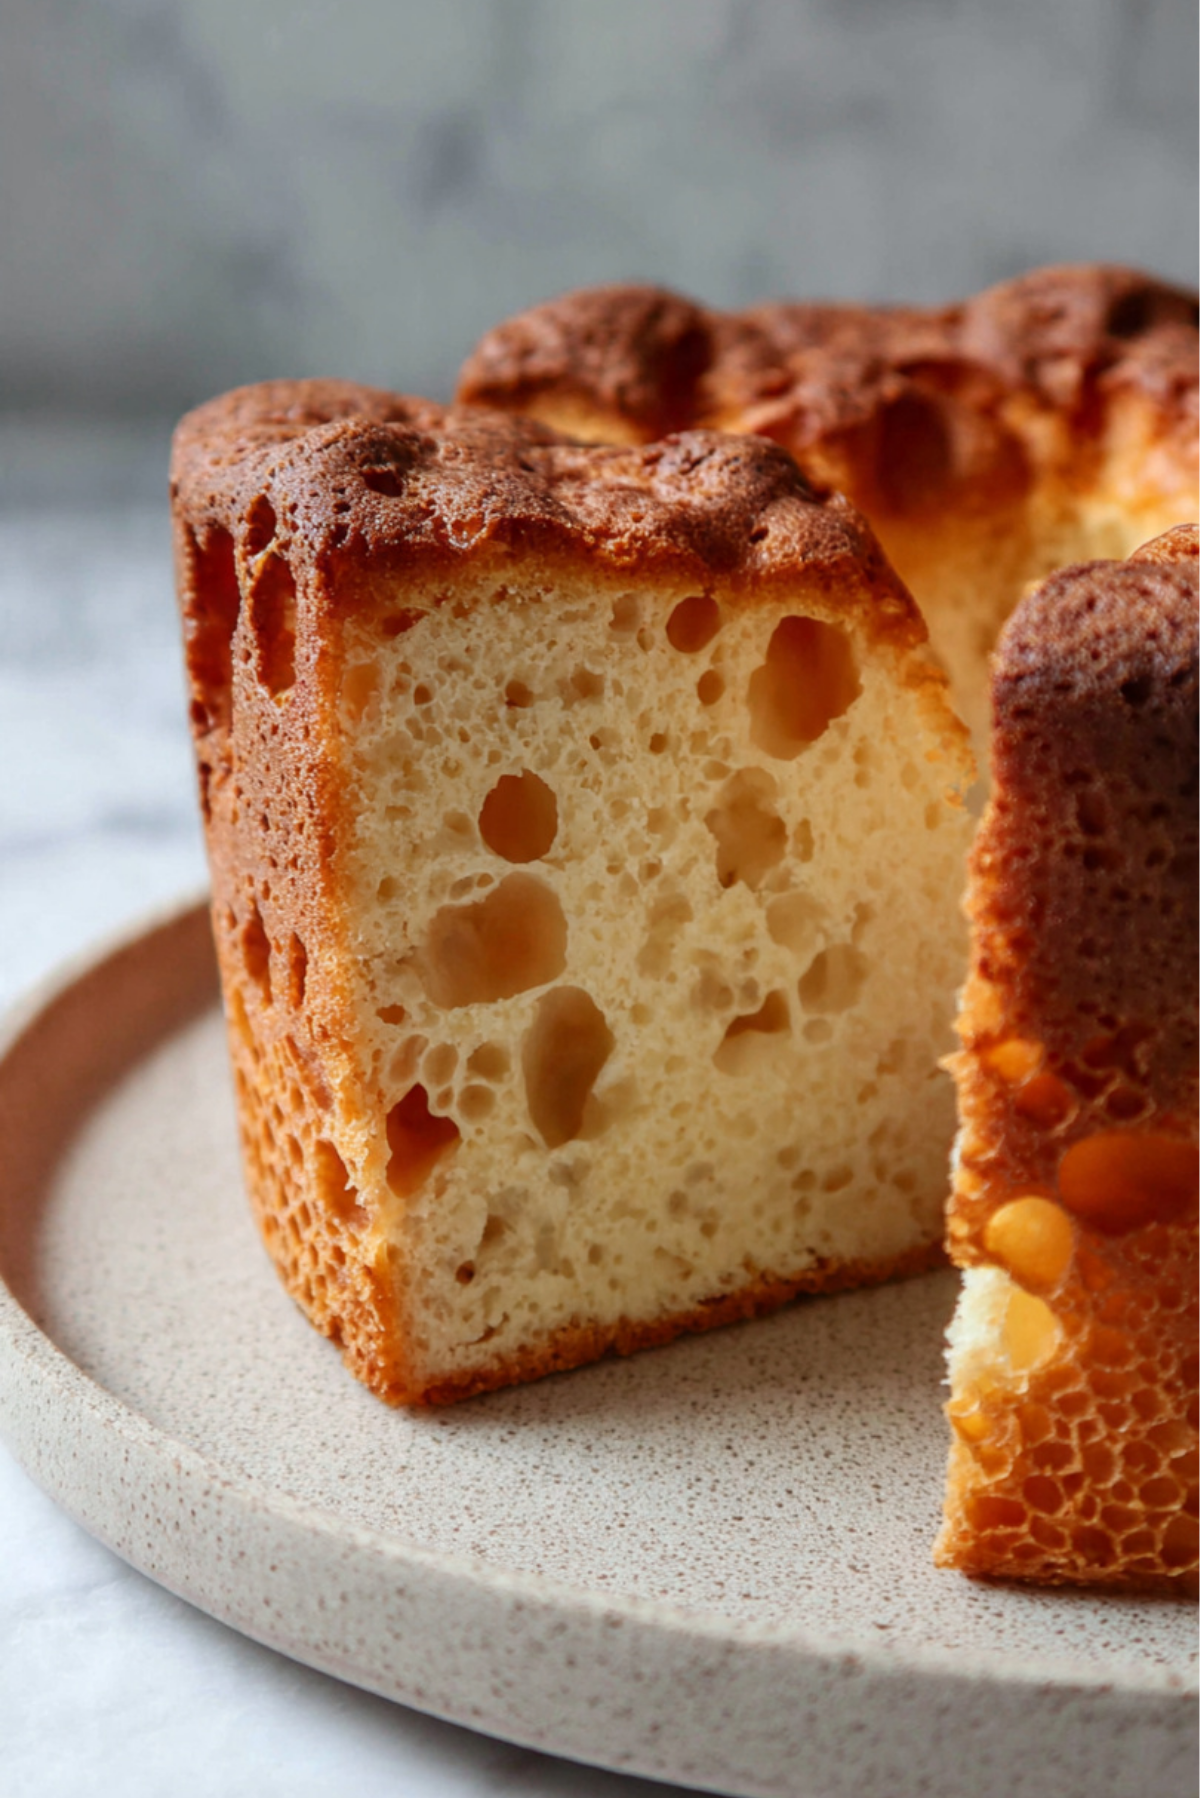
There’s something absolutely magical about the first slice of a Honeycomb Cake. As your knife glides through the golden crust, it reveals a stunning maze of airy tunnels and soft, honey-colored layers. Warm, slightly caramelized, and delightfully spongy, this cake offers a subtle dance of sweetness with a whisper of vanilla and buttery goodness. Trust me, you’re going to love this.
Behind the Recipe
Honeycomb Cake, also known as “Bánh Bò Nướng” in Vietnamese cuisine, is one of those nostalgic treats that immediately brings back memories of cozy kitchens and the sound of laughter during family gatherings. My first experience with this cake was at a Lunar New Year celebration, where it stood proudly on the dessert table. Its unusual, bubbly texture instantly drew attention, and after just one bite, I was hooked.
Recipe Origin or Trivia
Originating from Southeast Asia, particularly Vietnam, Honeycomb Cake is unique not just in appearance but also in technique. Its iconic “honeycomb” structure is formed by a special reaction between baking soda and eggs, without the use of yeast. The cake is made with tapioca starch instead of traditional flour, giving it a chewy texture that’s distinctly different from Western sponge cakes. Traditionally baked in a round tin and often flavored with pandan, it has become a favorite for both festive occasions and everyday indulgence.
Why You’ll Love Honeycomb Cake
This cake is more than just pretty to look at. Here’s why it deserves a spot in your baking rotation:
Versatile: Serve it with tea, coffee, or a scoop of vanilla ice cream for an indulgent twist.
Budget-Friendly: Made from pantry staples like eggs, sugar, and coconut milk, it won’t break the bank.
Quick and Easy: With no need for whipping egg whites or complicated steps, it’s beginner-friendly.
Customizable: Try it with pandan, coffee, or even matcha for a fun flavor twist.
Crowd-Pleasing: That wow-factor interior always gets gasps of delight at the table.
Make-Ahead Friendly: Stays moist and delicious even the next day, perfect for prepping ahead.
Great for Leftovers: A few seconds in the microwave, and it tastes fresh again.
Chef’s Pro Tips for Perfect Results
Getting those honeycomb tunnels just right is all about the details. Here are my best secrets:
- Use room-temperature eggs. This helps create an even texture and better rise.
- Don’t overmix. Gently combine the batter to avoid breaking the air bubbles.
- Strain the batter. It removes lumps and gives a silky-smooth texture.
- Preheat your pan. Pouring the batter into a hot pan gives it a jump start for that honeycomb effect.
- Tap the pan. Before baking, gently tap it on the counter to release air pockets.
Kitchen Tools You’ll Need
To bring this beautiful bake to life, here’s what you’ll need:
Mixing Bowls: For combining wet and dry ingredients separately.
Whisk or Hand Mixer: To beat the eggs and sugar until frothy.
Fine Mesh Strainer: For ensuring a smooth batter.
Measuring Cups and Spoons: Accuracy matters.
9-inch Round Cake Pan: Preferably metal and preheated for best texture.
Oven: Preheated and consistent heat is key.
Ingredients in Honeycomb Cake
Each ingredient plays a role in creating the signature chew and tunnel structure. Let’s dive in:
- Eggs: 6 large eggs. They act as the base structure and leavening agent.
- Sugar: 1 cup. Sweetens and caramelizes for a golden finish.
- Coconut Milk: 1 can (13.5 oz). Adds richness and tropical aroma.
- Tapioca Starch: 1½ cups. Creates that chewy, bouncy texture.
- All-Purpose Flour: 2 tablespoons. Adds slight structure to balance chewiness.
- Baking Powder: 2 teaspoons. Key to the bubble formation.
- Vanilla Extract: 1 teaspoon. Rounds out the flavor beautifully.
- Salt: ¼ teaspoon. Balances and enhances sweetness.
Ingredient Substitutions
Making swaps? Here are some good options:
Coconut Milk: Whole milk or evaporated milk.
Vanilla Extract: Pandan extract or almond extract.
Tapioca Starch: Arrowroot starch in a pinch, though texture may vary.
Sugar: Coconut sugar for a richer flavor.
Ingredient Spotlight
Tapioca Starch: This is what gives the cake its signature bounce and honeycomb structure. It reacts with the eggs and baking powder to form those beautiful tunnels.
Coconut Milk: Offers a creamy texture and subtle sweetness that’s essential to the cake’s flavor profile.
Instructions for Making Honeycomb Cake
This is where the fun begins. It’s easier than you think, and every step leads to that magical slice.
-
Preheat Your Equipment:
Preheat your oven to 350°F (175°C). Place your empty cake pan in the oven as it heats up. -
Combine Ingredients:
In a large bowl, whisk together eggs and sugar until light and frothy. Add coconut milk and vanilla extract. In another bowl, sift together tapioca starch, flour, baking powder, and salt. -
Prepare Your Cooking Vessel:
Remove the preheated cake pan, lightly grease it, then pour in the batter through a fine strainer. -
Assemble the Dish:
Tap the pan on the counter a few times to eliminate air bubbles. -
Cook to Perfection:
Bake for 45–50 minutes or until the top is golden and a toothpick comes out clean. -
Finishing Touches:
Let the cake cool for at least 30 minutes before removing it from the pan. -
Serve and Enjoy:
Slice into wedges and serve warm or at room temperature with tea or coffee.
Texture & Flavor Secrets
The outside bakes up into a firm golden crust while the inside remains moist, chewy, and full of those mesmerizing bubbles. The taste is a gentle sweetness with layers of coconut and vanilla unfolding slowly with each bite.
Cooking Tips & Tricks
Getting it just right is simple with a few tips:
- Preheating the pan is non-negotiable for tunnel formation.
- Don’t rush the cooling. Let it set so the texture settles.
- Strain the batter to remove lumps and excess bubbles.
What to Avoid
Even simple cakes can trip you up. Here’s what to steer clear of:
- Skipping the preheat. Cold pans mean no honeycomb.
- Overmixing the batter. It deflates the structure.
- Opening the oven door too early. Let it bake undisturbed.
Nutrition Facts
Servings: 10
Calories per serving: 210
Note: These are approximate values.
Preparation Time
Prep Time: 15 minutes
Cook Time: 45 minutes
Total Time: 1 hour
Make-Ahead and Storage Tips
Honeycomb Cake is fantastic fresh, but it keeps beautifully too. Store in an airtight container at room temperature for up to 2 days or refrigerate for up to 5 days. Warm individual slices in the microwave for a few seconds for that just-baked feel. It also freezes well for up to a month.
How to Serve Honeycomb Cake
It’s a beauty on its own but here are a few fun ways to serve it:
- Dust with powdered sugar for a snowy look.
- Drizzle with sweetened condensed milk.
- Pair with a hot cup of oolong or jasmine tea.
- Add a scoop of coconut or vanilla ice cream on the side.
Creative Leftover Transformations
Have leftovers? Get creative:
- Toast slices lightly for a caramelized edge.
- Dice and layer with whipped cream for a quick parfait.
- Crumble and use as a topping for ice cream or yogurt.
Additional Tips
A few more ideas to make your baking journey smoother:
- Use fresh baking powder for best results.
- Let the eggs come to room temp for optimal rise.
- Test your oven temperature with a thermometer for accuracy.
Make It a Showstopper
Presentation makes a difference. For that wow effect:
- Garnish with toasted coconut flakes.
- Use a bundt pan for a sculpted shape.
- Serve on a pastel cake stand for vintage flair.
Variations to Try
Bored of classic? Try these fun spins:
- Pandan Honeycomb Cake: Add pandan extract for a vibrant green color and earthy flavor.
- Chocolate Swirl: Fold in cocoa powder or chocolate syrup for marbled goodness.
- Coffee Infused: Replace part of the coconut milk with strong coffee.
- Lemon Zest Twist: Add lemon zest for a citrusy brightness.
- Mini Cakes: Pour into cupcake molds for individual portions.
FAQ’s
Q1: Can I make this without coconut milk?
A1: Yes, you can use whole milk or evaporated milk, though the flavor will be slightly different.
Q2: Why didn’t my cake have the honeycomb texture?
A2: It could be due to a cold pan or overmixed batter. Be sure to follow the tips carefully.
Q3: Is it gluten-free?
A3: Almost. Swap the all-purpose flour for a gluten-free flour blend to make it fully gluten-free.
Q4: Can I add food coloring?
A4: Yes, just a few drops of gel coloring works well without altering texture.
Q5: What’s the best way to store it?
A5: Airtight at room temp for 2 days or in the fridge for 5. Warm before serving.
Q6: Can I make it in a bundt pan?
A6: Absolutely. Just adjust bake time and be sure to grease well.
Q7: Why is it called Honeycomb Cake?
A7: The interior texture resembles a honeycomb due to the tunnel structure created during baking.
Q8: Can I freeze it?
A8: Yes, slice and wrap in plastic, then freeze for up to a month.
Q9: How do I know when it’s done baking?
A9: The top should be golden and a toothpick should come out clean.
Q10: Can I reduce the sugar?
A10: Slightly, but it may affect the structure and texture. Reduce no more than ¼ cup.
Conclusion
Honeycomb Cake is more than a dessert. It’s a celebration of texture, flavor, and the beauty of simple ingredients coming together in perfect harmony. Whether you’re new to baking or a seasoned pro, this cake is guaranteed to become a favorite. So preheat that oven and let the magic happen.
Print
Honeycomb Cake
- Prep Time: 15 minutes
- Cook Time: 45 minutes
- Total Time: 1 hour
- Yield: 10 servings
- Category: Dessert
- Method: Baking
- Cuisine: Vietnamese
- Diet: Vegetarian
Description
This Vietnamese-inspired Honeycomb Cake is soft, chewy, and filled with delicate air tunnels that create a mesmerizing honeycomb texture. With hints of coconut and vanilla, it’s a lightly sweet dessert that’s perfect for sharing over tea or coffee.
Ingredients
- 6 large eggs
- 1 cup sugar
- 1 can (13.5 oz) coconut milk
- 1½ cups tapioca starch
- 2 tablespoons all-purpose flour
- 2 teaspoons baking powder
- 1 teaspoon vanilla extract
- ¼ teaspoon salt
Instructions
- Preheat oven to 350°F (175°C) and place the cake pan inside to preheat as well.
- In a mixing bowl, whisk together eggs and sugar until frothy. Add coconut milk and vanilla extract, and mix until combined.
- In a separate bowl, sift together tapioca starch, flour, baking powder, and salt.
- Gradually mix dry ingredients into the wet mixture until just combined. Do not overmix.
- Remove the preheated pan from the oven, lightly grease it, and pour the batter through a fine strainer into the pan.
- Tap the pan gently on the counter to release any bubbles.
- Bake for 45–50 minutes or until the top is golden brown and a toothpick comes out clean.
- Let the cake cool for at least 30 minutes before removing from the pan. Slice and serve warm or at room temperature.
Notes
- Ensure the cake pan is hot before adding the batter to help form the honeycomb texture.
- Straining the batter creates a smoother texture with fewer lumps.
- Use room-temperature eggs for better rise and consistency.
- Store in an airtight container at room temperature or refrigerate for longer shelf life.
Nutrition
- Serving Size: 1 slice
- Calories: 210
- Sugar: 18g
- Sodium: 105mg
- Fat: 9g
- Saturated Fat: 7g
- Unsaturated Fat: 2g
- Trans Fat: 0g
- Carbohydrates: 30g
- Fiber: 1g
- Protein: 4g
- Cholesterol: 93mg