

There is something almost magical about opening a lunchbox and finding a cookie that looks like it holds a little bit of everything you love. That first bite, slightly crisp at the edges and soft right in the center, packed with chocolate, crunch, and just enough sweetness to make you smile, feels like a tiny celebration in the middle of the day. Trust me, you’re going to love this. These cookies are playful, generous, and honestly a little over the top in the best possible way.
Why These Cookies Feel Like a Sweet Little Surprise in Every Bite
You know those treats that make people pause mid chew and say, “Wait, what’s in this?” That is exactly the kind of reaction these cookies create. They are layered with oats for heartiness, chocolate chips for melty richness, pretzel pieces for crunch, and colorful candy bits that make them look like they belong in a bakery window.
They are chewy, slightly salty, sweet, and textured all at once. This one’s a total game changer for bake sales, after school snacks, or just when you want to fill your kitchen with that warm, buttery cookie aroma.
A Playful Spin on Classic American Cookie Culture
Cookies have long been a staple in American kitchens, especially the classic chocolate chip variety that became famous in the early twentieth century. Over time, home bakers began experimenting, tossing in pantry odds and ends, creating what many lovingly call kitchen sink cookies.
Everything But The Lunchbox Cookies are part of that same tradition. They celebrate creativity and a bit of kitchen freedom. Instead of sticking to one mix in, we embrace variety. It is the kind of recipe that feels nostalgic and modern at the same time, which is probably why it disappears so quickly from the cooling rack.
Why This Recipe Always Delivers
Before we dive deeper into mixing bowls and measuring cups, let me tell you why this recipe works so beautifully every single time.
Versatile: You can swap mix ins based on what you have in your pantry, and the base dough still holds everything together perfectly.
Budget-Friendly: Most of the ingredients are everyday baking staples, plus small amounts of snack items you might already have.
Quick and Easy: No complicated techniques here, just simple steps and straightforward baking.
Customizable: Add nuts, swap candies, or adjust the chocolate ratio to match your cravings.
Crowd-Pleasing: Kids adore the colorful bits, adults appreciate the sweet and salty balance.
Make-Ahead Friendly: The dough chills well and can be baked straight from the refrigerator.
Great for Leftovers: They store beautifully and even taste better the next day as flavors settle.
Pro Tips from My Kitchen to Yours
Before you preheat the oven, here are a few insider tips that make a real difference.
- Use room temperature butter so it creams smoothly with the sugars.
- Lightly crush the pretzels, do not pulverize them, so you keep those crunchy pockets.
- Chill the dough for at least 30 minutes if you want thicker cookies.
- Slightly underbake them, they will finish setting on the baking sheet.
- Sprinkle a tiny pinch of flaky salt on top right after baking for an extra flavor pop.
Essential Tools That Make Baking Easier
Every good bake starts with the right tools, and thankfully you do not need anything fancy.
Mixing Bowls: One large bowl for wet ingredients and one medium bowl for dry ingredients keeps everything organized.
Hand Mixer or Stand Mixer: Helps cream the butter and sugars until light and fluffy.
Measuring Cups and Spoons: Accurate measurements ensure consistent texture.
Baking Sheets: Use sturdy sheets lined with parchment paper for even baking.
Cookie Scoop: Keeps your cookies uniform in size so they bake evenly.
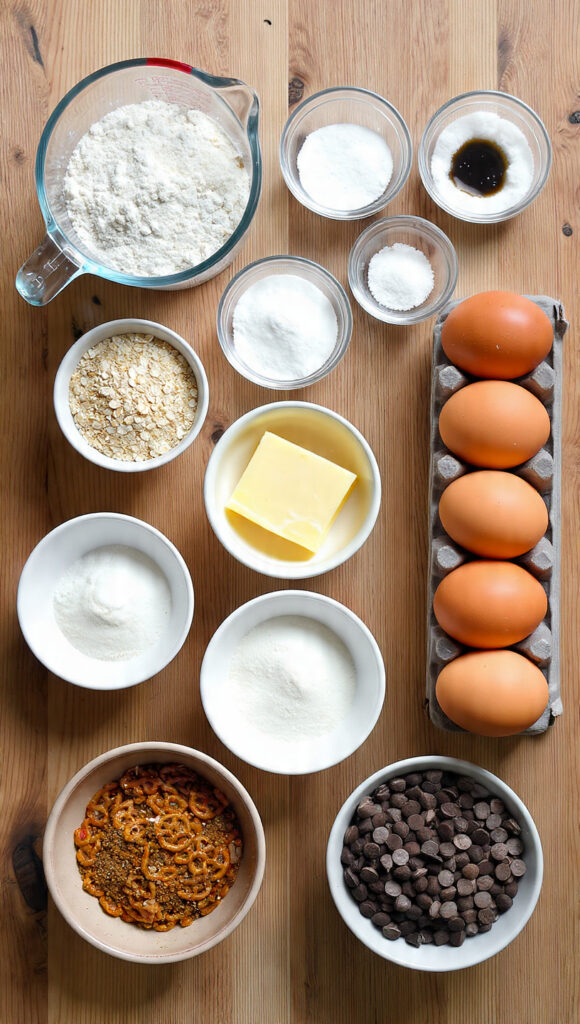
The Ingredients That Make the Magic Happen
There is something satisfying about lining up your ingredients before you start. Each one plays a role in building flavor and texture, and together they create something truly irresistible.
- All Purpose Flour: 2 1/4 cups, provides structure and keeps the cookies soft yet sturdy.
- Old Fashioned Rolled Oats: 1 cup, adds chewiness and a hearty texture.
- Baking Soda: 1 teaspoon, helps the cookies rise and spread properly.
- Salt: 1/2 teaspoon, balances sweetness and enhances flavor.
- Unsalted Butter: 1 cup, softened, gives richness and that classic buttery taste.
- Brown Sugar: 3/4 cup, packed, adds moisture and a slight caramel note.
- Granulated Sugar: 1/2 cup, creates crisp edges.
- Large Eggs: 2, bind everything together and add structure.
- Vanilla Extract: 2 teaspoons, deepens and rounds out the sweetness.
- Semi Sweet Chocolate Chips: 1 cup, bring melty pockets of chocolate.
- Crushed Pretzels: 3/4 cup, lightly crushed, add a salty crunch.
- Candy Coated Chocolate Pieces: 3/4 cup, provide color and a sweet candy bite.
Easy Swaps If You Want to Get Creative
Part of the fun is making it your own.
Chocolate Chips: Use dark chocolate or milk chocolate instead.
Pretzels: Swap with chopped toasted almonds for a nutty crunch.
Candy Pieces: Try peanut butter chips or white chocolate chips.
Rolled Oats: Quick oats can work, though the texture will be slightly softer.
Spotlight on Two Stars of the Show
Crushed Pretzels: These add that unexpected salty snap that makes each bite more interesting. The contrast between sweet dough and salty crunch is what keeps you reaching for another.
Candy Coated Chocolate Pieces: They melt slightly but still hold their shape, adding pops of color and a subtle crisp shell that kids absolutely adore.
Let’s Bake These Beauties Together
Now that your ingredients are ready and your kitchen smells like anticipation, let’s get baking.
- Preheat Your Equipment: Preheat your oven to 350 degrees Fahrenheit and line baking sheets with parchment paper.
- Combine Ingredients: In a medium bowl, whisk together flour, oats, baking soda, and salt until evenly mixed.
- Prepare Your Cooking Vessel: In a large bowl, cream softened butter, brown sugar, and granulated sugar until light and fluffy. Beat in eggs one at a time, then stir in vanilla extract.
- Assemble the Dish: Gradually mix dry ingredients into the wet mixture. Fold in chocolate chips, crushed pretzels, and candy pieces until evenly distributed.
- Cook to Perfection: Scoop dough onto prepared baking sheets, spacing them about 2 inches apart. Bake for 10 to 12 minutes until edges are golden and centers look slightly soft.
- Finishing Touches: Let cookies cool on the baking sheet for 5 minutes before transferring to a wire rack.
- Serve and Enjoy: Enjoy warm with a glass of milk or pack into lunchboxes for a sweet surprise.
The Texture and Flavor Story in Every Bite
The first thing you notice is the crisp edge, followed by a soft, chewy center. The oats add heartiness, the chocolate melts into creamy pockets, and the pretzels provide that satisfying crunch. Then comes the subtle candy shell crackle. It is layered, balanced, and just indulgent enough to feel special.
Helpful Baking Tips for Perfect Results
Even simple cookies benefit from a few thoughtful touches.
- Chill the dough if your kitchen is warm.
- Do not overcrowd the baking sheet.
- Rotate pans halfway through baking for even browning.
- Let them rest before moving, they are delicate when hot.
Common Mistakes and How to Avoid Them
Sometimes small missteps change the outcome, but they are easy to fix.
- Overmixing the dough can make cookies tough, mix until just combined.
- Overbaking dries them out, pull them when centers still look slightly soft.
- Skipping parchment paper may cause sticking, always line your pan.
A Quick Look at the Nutrition
Servings: 24 cookies
Calories per serving: 210
Note: These are approximate values.
Time Breakdown So You Can Plan Ahead
Prep Time: 15 minutes
Cook Time: 12 minutes
Total Time: 27 minutes
Make Ahead and Storage Made Simple
You can prepare the dough up to 48 hours in advance and keep it covered in the refrigerator. Baked cookies store in an airtight container at room temperature for up to 5 days. They freeze well for up to 2 months. To reheat, pop one in the microwave for about 10 seconds for that just baked feel.
Serving Ideas That Make Them Even Better
Stack them high on a cake stand for parties, tuck them into cellophane bags for gifts, or sandwich vanilla ice cream between two for a fun dessert twist.
Fun Ways to Reinvent the Leftovers
Crumble cookies over yogurt for a sweet crunch. Chop and mix into vanilla ice cream. Or press pieces into the base of a no bake cheesecake for a playful crust.
Extra Tips for Even More Flavor
A pinch of cinnamon in the dough adds warmth. A sprinkle of flaky salt on top enhances sweetness. Let the dough rest for deeper flavor development.
Turn Them Into a Showstopper
Press a few extra candy pieces on top of each dough ball before baking for a colorful finish. Arrange on a white platter and let the vibrant bits shine against the golden cookies.
Variations You Will Want to Try
Add shredded coconut for tropical flair.
Stir in white chocolate and dried cranberries for a festive feel.
Use peanut butter chips for a nutty twist.
Mix in chopped toffee pieces for caramel crunch.
FAQ’s
Q1: Can I freeze the dough?
Yes, scoop into balls and freeze. Bake straight from frozen, adding 1 to 2 extra minutes.
Q2: Can I make them smaller?
Absolutely, reduce baking time by a couple of minutes.
Q3: Why are my cookies flat?
Your butter may have been too warm. Chill the dough before baking.
Q4: Can I reduce the sugar?
You can slightly reduce it, though texture may change.
Q5: Can I use salted butter?
Yes, just reduce the added salt slightly.
Q6: Do I need to chill the dough?
Not required, but it helps with thickness.
Q7: Can I add nuts?
Yes, about 1/2 cup of chopped nuts works well.
Q8: How do I keep them soft?
Store with a slice of bread in the container.
Q9: Can I double the batch?
Yes, simply double all ingredients evenly.
Q10: Are they good for bake sales?
Absolutely, they are colorful and eye catching.
Conclusion
There is something joyful about baking a batch of cookies that feel a little bit spontaneous and a lot delicious. Everything But The Lunchbox Cookies bring together crunch, chew, sweetness, and a hint of salt in every bite. Let me tell you, it’s worth every bite. Once you make them, do not be surprised if they become a regular request in your kitchen.
Print
Everything But The Lunchbox Cookies
- Prep Time: 15 minutes
- Cook Time: 12 minutes
- Total Time: 27 minutes
- Yield: 24 cookies
- Category: Dessert
- Method: Baking
- Cuisine: American
- Diet: Vegetarian
Description
Soft and chewy cookies packed with oats, chocolate chips, crunchy pretzels, and colorful candy pieces. Sweet, salty, and loaded with texture in every bite.
Ingredients
- 2 1/4 cups all purpose flour
- 1 cup old fashioned rolled oats
- 1 teaspoon baking soda
- 1/2 teaspoon salt
- 1 cup unsalted butter, softened
- 3/4 cup brown sugar, packed
- 1/2 cup granulated sugar
- 2 large eggs
- 2 teaspoons vanilla extract
- 1 cup semi sweet chocolate chips
- 3/4 cup crushed pretzels, lightly crushed
- 3/4 cup candy coated chocolate pieces
Instructions
- Preheat oven to 350 degrees Fahrenheit and line baking sheets with parchment paper.
- In a medium bowl, whisk together flour, oats, baking soda, and salt.
- In a large bowl, cream softened butter, brown sugar, and granulated sugar until light and fluffy. Beat in eggs one at a time, then mix in vanilla extract.
- Gradually combine dry ingredients with wet ingredients until just mixed.
- Fold in chocolate chips, crushed pretzels, and candy coated chocolate pieces.
- Scoop dough onto prepared baking sheets, spacing about 2 inches apart.
- Bake for 10 to 12 minutes until edges are golden and centers remain slightly soft.
- Cool on baking sheet for 5 minutes, then transfer to a wire rack to cool completely.
Notes
- Chill the dough for 30 minutes for thicker cookies.
- Do not overbake, cookies will continue to set as they cool.
- Store in an airtight container for up to 5 days.
Nutrition
- Serving Size: 1 cookie
- Calories: 210
- Sugar: 15g
- Sodium: 140mg
- Fat: 11g
- Saturated Fat: 6g
- Unsaturated Fat: 4g
- Trans Fat: 0g
- Carbohydrates: 26g
- Fiber: 1g
- Protein: 3g
- Cholesterol: 35mg
… [Trackback]
[…] Find More on to that Topic: cookingflash.com/everything-but-the-lunchbox-cookies/ […]
… [Trackback]
[…] Read More Info here on that Topic: cookingflash.com/everything-but-the-lunchbox-cookies/ […]