
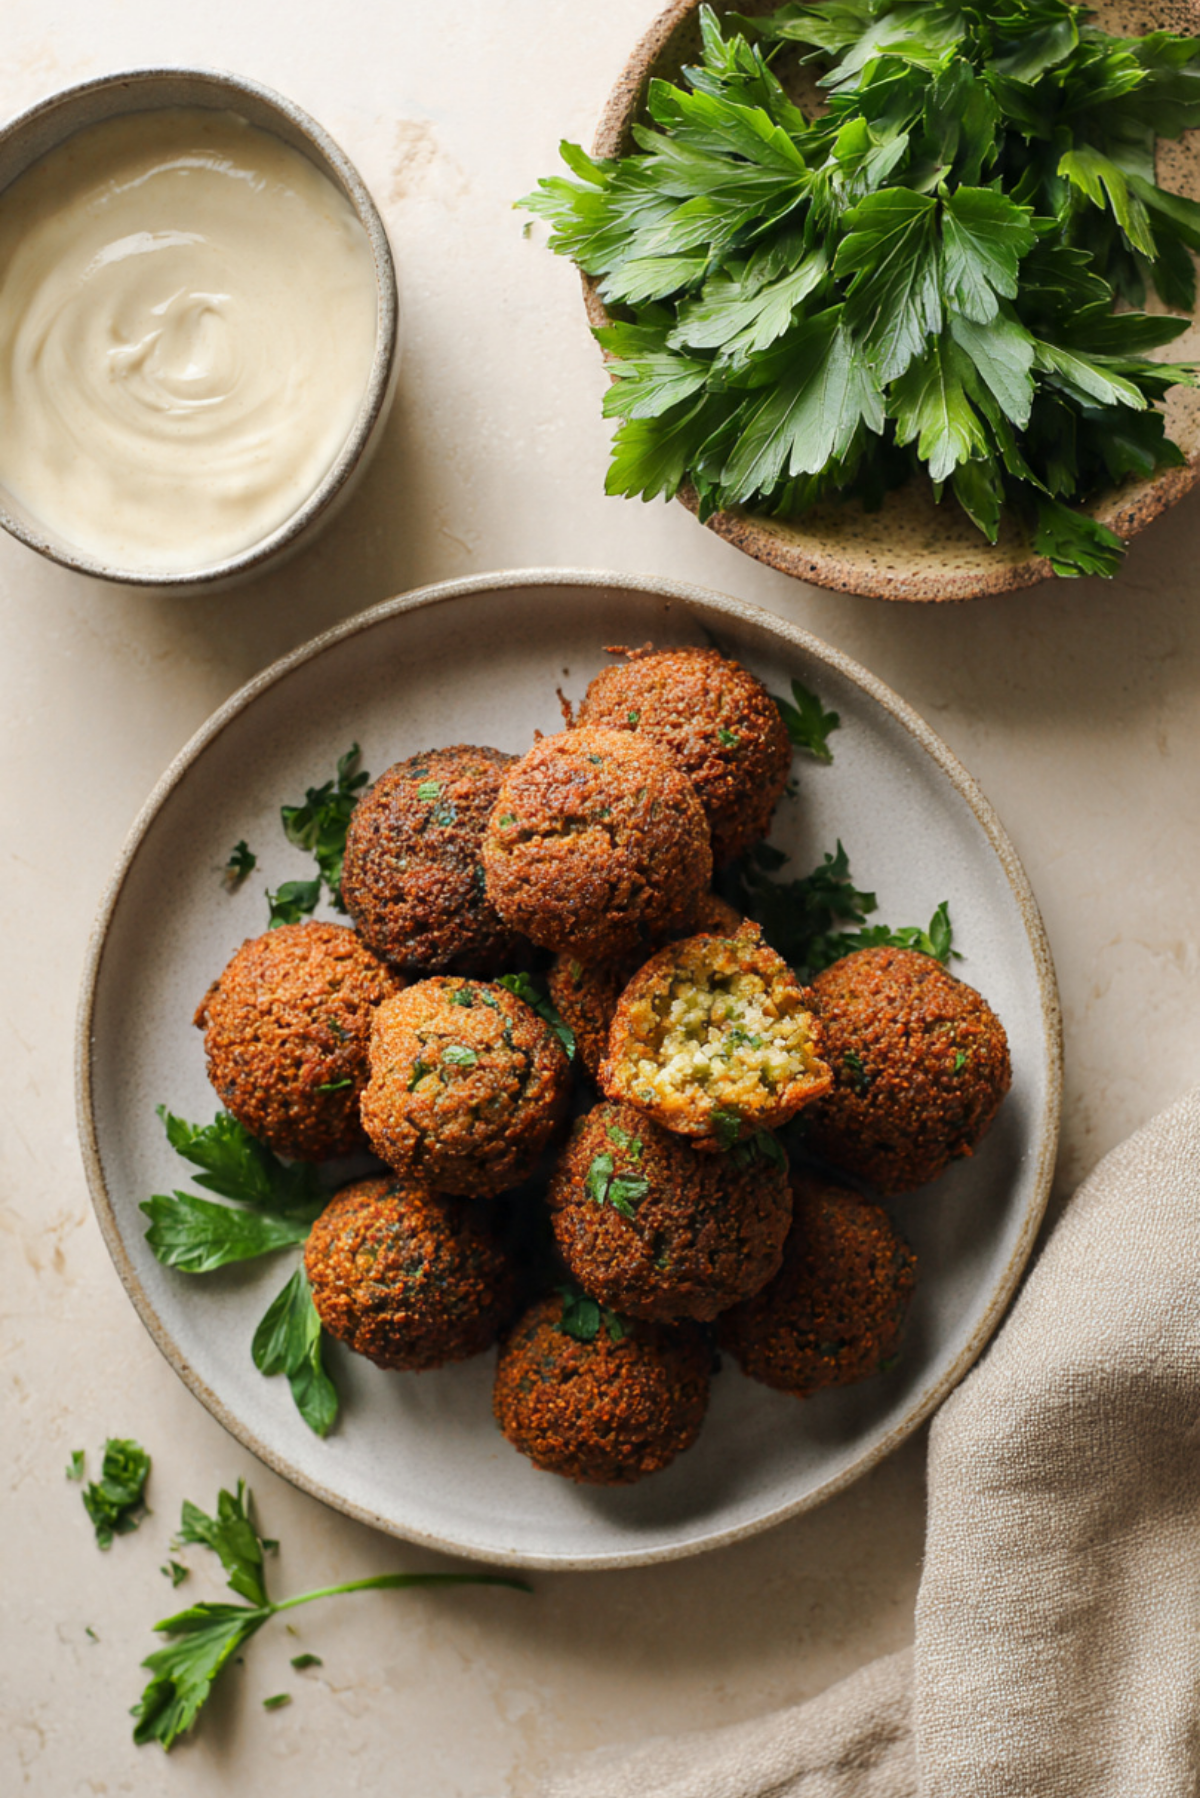
There is something deeply comforting about the smell of herbs and spices coming together in a warm kitchen, and this dish brings that feeling instantly. Crispy on the outside, tender and green on the inside, these falafel bites are the kind of food that makes you slow down and enjoy the moment. Trust me, you’re going to love this, because every bite feels both familiar and exciting at the same time.
Why This Dish Deserves a Spot on Your Table
This recipe has a way of winning people over from the very first batch. It feels special enough for guests, yet simple enough for a quiet weeknight. The balance of herbs, garlic, and warm spices creates a flavor that feels bold but not heavy, which is why it keeps finding its way back into my kitchen.
A Little History Behind This Classic Favorite
Falafel has deep roots across the Middle East, where it has long been enjoyed as street food and home cooking alike. Traditionally made from chickpeas or fava beans, it was created as an affordable, filling meal that could feed many. Over time, each region added its own touch, but the heart of the dish stayed the same, humble ingredients turned into something memorable.
What Makes This Recipe So Reliable
This is where everything really starts to come together, and now let’s dive into why this version works so well every single time.
Versatile: These crispy bites fit into wraps, bowls, salads, or can stand proudly on their own.
Budget-Friendly: Simple pantry ingredients keep costs low without sacrificing flavor.
Quick and Easy: Once the mixture is ready, cooking is fast and satisfying.
Customizable: You can adjust herbs and spices to match your personal taste.
Crowd-Pleasing: Even picky eaters tend to reach for seconds.
Make-Ahead Friendly: The mixture can be prepared in advance and cooked when needed.
Great for Leftovers: They reheat beautifully and stay flavorful.
Chef Secrets for Perfect Results Every Time
Before you start shaping and frying, a few insider tips make all the difference. Small details like soaking chickpeas properly and not over-processing the mixture help you get that ideal texture. This one’s a total game-changer once you know these tricks.
Essential Tools You Will Need
A smooth cooking flow starts with the right tools, and thankfully you do not need anything fancy.
Food Processor: Helps blend everything evenly without turning it into paste.
Large Bowl: Gives you space to mix and rest the falafel mixture.
Heavy Skillet or Pot: Keeps oil temperature steady for even cooking.
Slotted Spoon: Makes removing the falafel easy and clean.
Ingredients You Will Need For This Recipe
Every ingredient plays its role, and together they create that unmistakable aroma and taste.
- Dried Chickpeas: 1 cup, soaked overnight, they form the hearty base and keep the inside tender.
- Fresh Parsley: 1 cup, loosely packed, adds brightness and color.
- Fresh Cilantro: 1 cup, loosely packed, brings a fresh, citrusy note.
- Yellow Onion: 1 small, roughly chopped, adds sweetness and moisture.
- Garlic Cloves: 4 cloves, provide depth and warmth.
- Ground Cumin: 1 teaspoon, gives earthy richness.
- Ground Coriander: 1 teaspoon, adds gentle spice.
- Salt: 1 teaspoon, balances all flavors.
- Black Pepper: 0.5 teaspoon, adds subtle heat.
- Baking Powder: 0.5 teaspoon, helps keep the inside light.
- All Purpose Flour: 2 tablespoons, binds the mixture.
- Neutral Oil: For frying, creates that golden crust.
Easy Ingredient Swaps to Try
Cooking should feel flexible, not stressful.
Parsley: Swap with more cilantro if you love a bolder herb flavor.
All Purpose Flour: Use chickpea flour for a slightly nuttier taste.
Neutral Oil: Any high heat oil works well for frying.
Spotlight on Key Ingredients
Dried Chickpeas: Soaked but not cooked chickpeas give the falafel its signature texture.
Fresh Herbs: Parsley and cilantro are what create that vibrant green center and fresh aroma.
Let’s Start Cooking Together
Now that everything is ready, let’s dive into the process and enjoy every step.
- Preheat Your Equipment: Heat oil in a deep skillet over medium heat until hot but not smoking.
- Combine Ingredients: Add soaked chickpeas, herbs, onion, garlic, spices, salt, pepper, baking powder, and flour to a food processor and pulse until coarse.
- Prepare Your Cooking Vessel: Line a plate with paper towels and keep it nearby.
- Assemble the Dish: Scoop and shape the mixture into small balls or patties.
- Cook to Perfection: Fry in batches until golden brown, about 3 to 4 minutes per side.
- Finishing Touches: Transfer to paper towels to drain excess oil.
- Serve and Enjoy: Serve warm with your favorite sauce or sides.
How Texture and Flavor Come Together
The outside turns crisp and deeply golden, while the inside stays soft and herbaceous. As they cook, the spices bloom in the oil, creating layers of flavor that build with each bite. Let me tell you, it’s worth every bite.
Helpful Cooking Tips for Success
A few simple tips can make your experience even smoother.
- Do not overcrowd the pan, it lowers oil temperature.
- Keep the mixture slightly coarse for better texture.
- Taste a small test piece before frying the whole batch.
Common Mistakes and How to Avoid Them
Even classics have a few pitfalls, but they are easy to fix.
- Using canned chickpeas leads to a mushy texture.
- Over-blending removes the signature crunch.
- Frying oil that is too cool causes soggy results.
Nutrition Breakdown at a Glance
Servings: 4
Calories per serving: 320
Note: These are approximate values.
Time Needed From Start to Finish
Prep Time: 15 minutes
Cook Time: 15 minutes
Total Time: 30 minutes
Make-Ahead and Storage Tips
You can prepare the mixture up to one day ahead and store it covered in the refrigerator. Cooked falafel keep well for up to four days and can be reheated in the oven to restore crispness. They also freeze well after frying.
Serving Ideas to Elevate the Meal
Serve them in warm pita with fresh vegetables, tuck them into grain bowls, or enjoy them with a simple salad and sauce. They fit beautifully into almost any meal.
Creative Ways to Use Leftovers
Crumble them over salads, stuff them into wraps, or reheat and enjoy with eggs for a savory breakfast twist.
Extra Tips for Best Flavor
Fresh herbs make all the difference, and seasoning generously ensures bold flavor. Always let the mixture rest briefly before frying.
How to Make It Look Impressive
Arrange them on a platter with small bowls of sauce and herbs. The contrast of green, gold, and creamy white looks inviting and festive.
Fun Variations to Explore
Try adding chili flakes for heat, extra garlic for punch, or sesame seeds for added crunch. Each variation brings a new personality to the dish.
FAQ’s
1. Can I bake these instead of frying?
Yes, baking works, though the texture will be slightly less crisp.
2. Do I have to soak chickpeas overnight?
Yes, this step is essential for the right texture.
3. Can I freeze them before cooking?
Yes, shape them and freeze on a tray, then store in a bag.
4. What sauce pairs best with this dish?
Tahini based sauces are a classic choice.
5. How do I keep them from falling apart?
Make sure the mixture is coarse and well chilled.
6. Are they gluten free?
Use chickpea flour to make them gluten free.
7. Can I make them spicy?
Add cayenne or chili flakes to the mixture.
8. How long does the mixture last in the fridge?
Up to 24 hours before cooking.
9. Can I shallow fry instead of deep fry?
Yes, just turn them carefully for even browning.
10. Why is the inside green?
The fresh herbs give it that vibrant color.
Conclusion
This recipe brings together tradition, flavor, and comfort in the best way possible. Once you try making it at home, it becomes hard not to fall in love with the process and the result. Give it a try, share it with people you love, and enjoy every crispy, satisfying bite.
Print
Authentic Middle Eastern Falafel
- Prep Time: 15 minutes
- Cook Time: 15 minutes
- Total Time: 30 minutes
- Yield: 4 servings
- Category: Main Dish
- Method: Frying
- Cuisine: Middle Eastern
- Diet: Vegan
Description
Crispy on the outside and tender on the inside, these authentic Middle Eastern falafel are packed with fresh herbs, warm spices, and rich chickpea flavor, perfect for wraps, bowls, or dipping.
Ingredients
- 1 cup dried chickpeas, soaked overnight
- 1 cup fresh parsley, loosely packed
- 1 cup fresh cilantro, loosely packed
- 1 small yellow onion, roughly chopped
- 4 garlic cloves
- 1 teaspoon ground cumin
- 1 teaspoon ground coriander
- 1 teaspoon salt
- 0.5 teaspoon black pepper
- 0.5 teaspoon baking powder
- 2 tablespoons all purpose flour
- Neutral oil for frying
Instructions
- Drain the soaked chickpeas thoroughly and add them to a food processor.
- Add parsley, cilantro, onion, garlic, cumin, coriander, salt, pepper, baking powder, and flour.
- Pulse until the mixture is coarse and holds together when pressed.
- Heat neutral oil in a deep skillet over medium heat.
- Shape the mixture into small balls or patties.
- Fry in batches for 3 to 4 minutes per side until golden brown.
- Remove with a slotted spoon and drain on paper towels.
- Serve warm with your favorite sauce.
Notes
- Do not use canned chickpeas, as they will affect the texture.
- Keep the mixture slightly coarse for the best bite.
- Test fry one piece before cooking the full batch.
Nutrition
- Serving Size: 1 serving
- Calories: 320
- Sugar: 4g
- Sodium: 420mg
- Fat: 14g
- Saturated Fat: 2g
- Unsaturated Fat: 12g
- Trans Fat: 0g
- Carbohydrates: 38g
- Fiber: 9g
- Protein: 11g
- Cholesterol: 0mg