
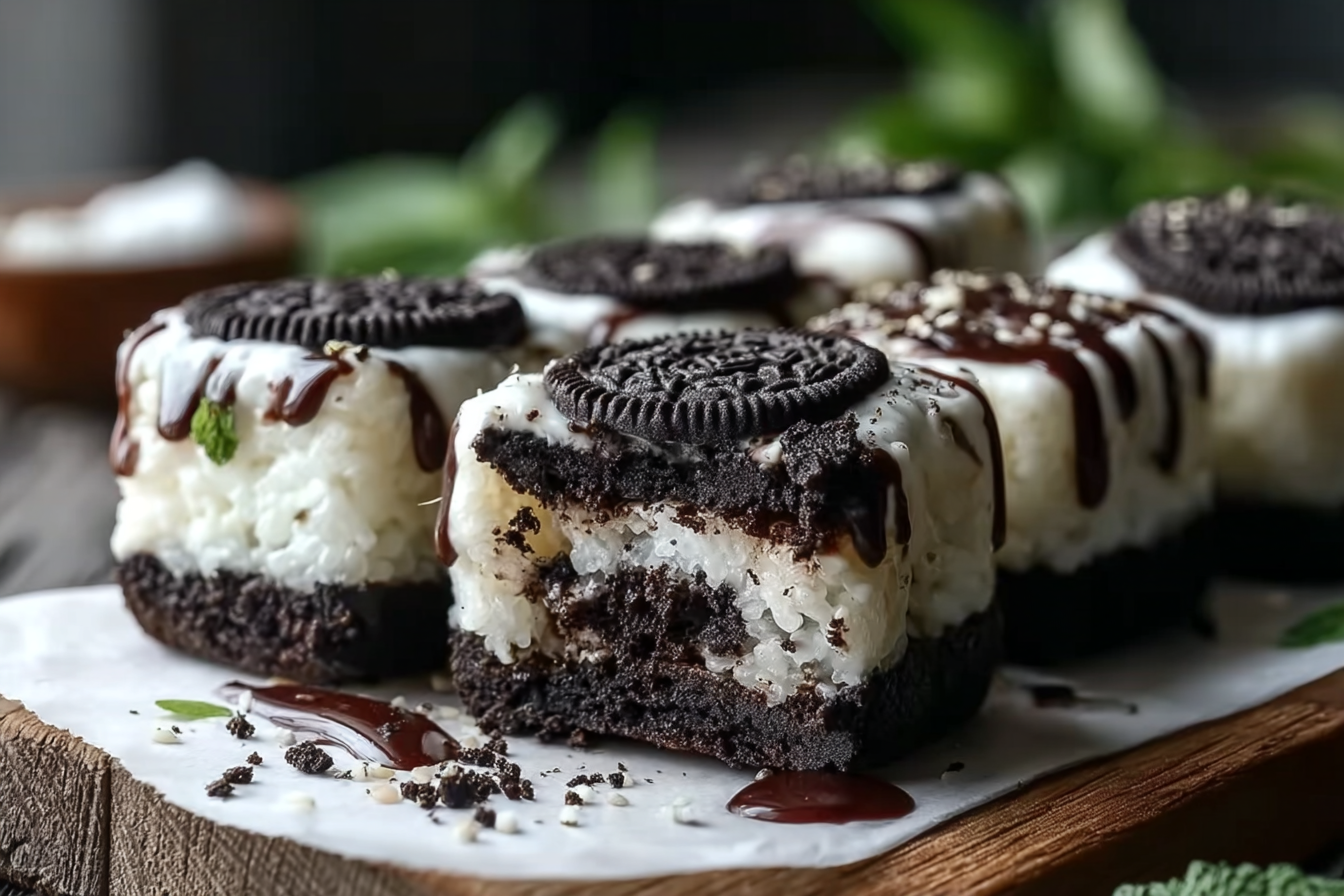
If you thought Oreos couldn’t get any better, let me introduce you to something playful, sweet, and oh-so-creative — Oreo Sushi. Imagine the crunch of the cookies meeting the creamy filling, rolled into a bite-sized treat that looks like sushi but tastes like pure dessert magic. It’s quirky, fun, and surprisingly elegant, making it the kind of recipe you’ll want to whip up just to see smiles all around.
Behind the Recipe
This recipe is born from the love of making something whimsical out of everyday snacks. We all know and adore Oreos, but here they get a total makeover. Instead of dunking them in milk, we’re rolling them into sushi-inspired bites that are perfect for parties, playful snacking, or even a cheeky midnight treat. It feels nostalgic yet exciting, reminding us that food can be both fun and delicious.
Recipe Origin or Trivia
The concept of dessert sushi is not new, but Oreo Sushi has become a viral sensation thanks to social media. People love transforming classic treats into creative desserts, and this is a shining example. While sushi traditionally comes from Japan with delicate flavors and artful presentation, this sweet spin is all about celebrating creativity and playful food trends. It bridges cultures in the most delicious way — East meets West with a cookie twist.
Why You’ll Love 2-Ingredient Oreo Sushi
There are plenty of reasons this recipe will instantly win you over, and here are a few that stand out:
Versatile: It works as a snack, dessert, or even a conversation starter at gatherings.
Budget-Friendly: With just two inexpensive ingredients, you can make a whole tray without breaking the bank.
Quick and Easy: No oven, no stove — just a few minutes of prep and you’re done.
Customizable: You can drizzle chocolate, add sprinkles, or pair it with fruit for endless fun variations.
Crowd-Pleasing: Everyone from kids to adults will be delighted when they see sushi made of Oreos.
Make-Ahead Friendly: You can roll these up ahead of time and keep them chilled until serving.
Great for Leftovers: If by chance you have some left, they still taste amazing the next day.
Chef’s Pro Tips for Perfect Results
The key to Oreo Sushi is balance between creaminess and firmness. Here’s how to make sure every roll comes out perfect:
- Crush the cookies finely so the dough is smooth and easy to roll.
- Chill the filling briefly if it feels too soft — it makes spreading easier.
- Use plastic wrap to shape the roll tightly and evenly.
- Slice with a sharp knife, wiping between cuts for clean edges.
Kitchen Tools You’ll Need
You don’t need much to make this recipe shine, but a few basics will make the process smoother:
- Food Processor: To crush the Oreos into a fine, workable texture.
- Mixing Bowl: For combining the crushed cookies with the filling.
- Plastic Wrap: Helps roll and shape the sushi log neatly.
- Sharp Knife: Ensures clean slices that look like sushi pieces.
Ingredients in 2-Ingredient Oreo Sushi
Now let’s talk about the stars of this sweet sushi — just two humble ingredients that transform into something magical together.
- Oreo Cookies: 24 pieces. They create the chocolatey “rice” base once crushed.
- Oreo Cream Filling: from the cookies. This sweet, creamy layer becomes the “filling” for the sushi roll.
Ingredient Substitutions
While the beauty of this recipe lies in its simplicity, you can still play around with alternatives:
- Oreo Cookies: Any chocolate sandwich cookie works well.
- Oreo Cream Filling: Substitute with cream cheese frosting for a tangy twist.
Ingredient Spotlight
Oreo Cookies: More than just a snack, they provide both the structure and flavor of the sushi. Their crunch transforms into a pliable dough that’s easy to roll.
Instructions for Making 2-Ingredient Oreo Sushi
This recipe is as fun to make as it is to eat. Here’s how you’ll bring Oreo Sushi to life:
- Preheat Your Equipment: No oven here, but get your food processor ready for action.
- Combine Ingredients: Separate Oreos, setting aside the cream. Crush the cookies into fine crumbs and mix them into a dough with just a splash of water if needed.
- Prepare Your Cooking Vessel: Lay out plastic wrap on a clean surface to help with rolling.
- Assemble the Dish: Flatten the Oreo cookie dough into a thin rectangle, spread the cream filling evenly across the surface.
- Cook to Perfection: Roll tightly using the plastic wrap to form a sushi log.
- Finishing Touches: Chill in the fridge for 15–20 minutes to firm up.
- Serve and Enjoy: Slice into sushi-like pieces and enjoy the sweet surprise.
Texture & Flavor Secrets
The magic of Oreo Sushi lies in its contrasts. The crushed cookies create a soft yet slightly crumbly bite, while the cream filling adds a silky sweetness. Together, they mimic the delicate layers of sushi but in a dessert form that feels both rich and playful.
Cooking Tips & Tricks
To make this recipe even smoother, keep these tricks in mind:
- Use parchment paper if you don’t have plastic wrap for rolling.
- A serrated knife works just as well for clean cuts.
- Chill longer if you want firmer rolls that hold their shape better.
What to Avoid
Sometimes the simplest recipes can trip us up, so here’s what to watch for:
- Crushing too coarsely, which makes rolling difficult.
- Spreading the filling too thick, causing it to squeeze out.
- Skipping the chilling step, which makes the roll fall apart when slicing.
Nutrition Facts
Servings: 6
Calories per serving: 210
Note: These are approximate values.
Preparation Time
Prep Time: 15 minutes
Cook Time: 0 minutes
Total Time: 15 minutes
Make-Ahead and Storage Tips
These rolls are perfect for prepping in advance. You can assemble and chill the sushi log, then slice right before serving. Store leftovers in an airtight container in the fridge for up to 2 days. Freezing isn’t ideal since it changes the texture, but a quick chill always revives them.
How to Serve 2-Ingredient Oreo Sushi
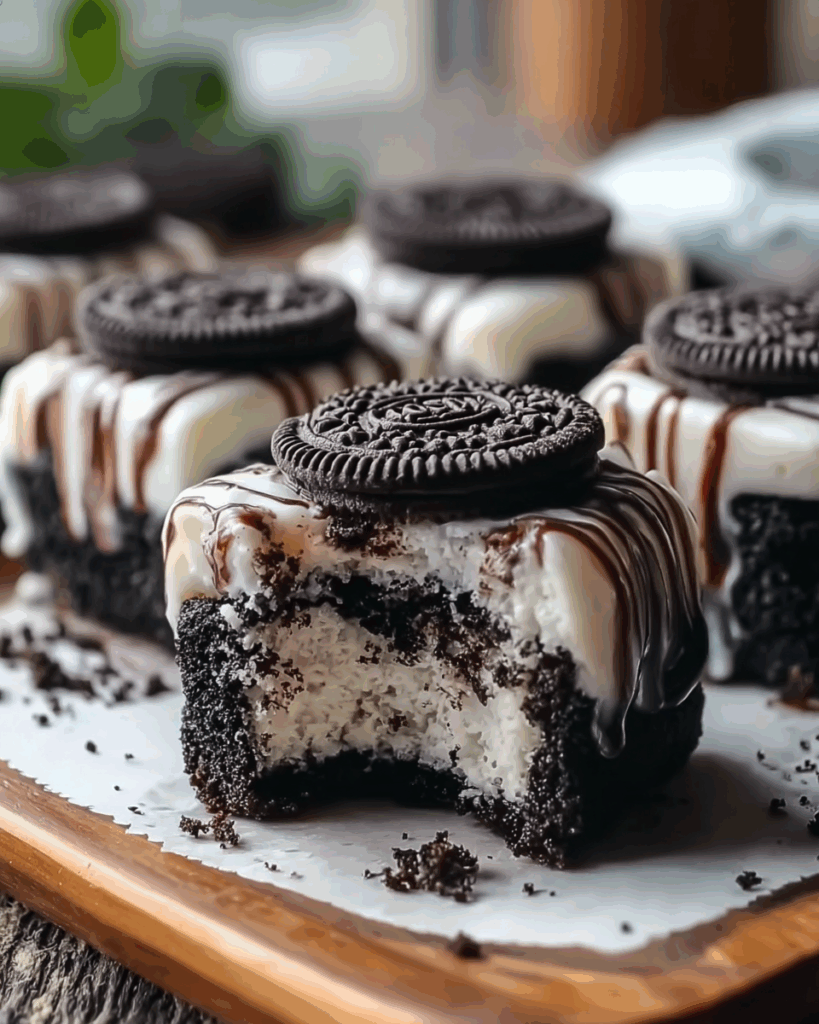
For a showstopping presentation, serve Oreo Sushi on a platter with chopsticks for fun. Drizzle with melted chocolate, sprinkle with crushed cookies, or pair with fresh strawberries for contrast. It’s playful finger food that doubles as a centerpiece.
Creative Leftover Transformations
If you’ve got extra slices, here’s how to reinvent them:
- Crumble them over ice cream for a decadent topping.
- Layer them into a parfait with whipped cream and berries.
- Use them as a surprise filling inside cupcakes.
Additional Tips
For even more flavor, consider adding a touch of peanut butter, Nutella, or fruit jam before rolling. Keep slices small and uniform for the best “sushi” look. Trust me, it’s worth every bite.
Make It a Showstopper
Presentation is everything here. Garnish the plate with mint leaves, edible flowers, or even a dusting of powdered sugar. Use a wooden sushi board for serving and watch your guests’ faces light up when they realize this isn’t sushi at all.
Variations to Try
- Add a thin layer of peanut butter inside before rolling for a nutty twist.
- Roll with shredded coconut for a tropical feel.
- Drizzle with white chocolate and sprinkles for a festive version.
- Pair with sliced bananas inside for a fruity surprise.
FAQ’s
Q1: Can I make Oreo Sushi without a food processor?
Yes, you can place the cookies in a zip bag and crush them with a rolling pin until fine.
Q2: How do I keep the roll from falling apart?
Chilling is key — always refrigerate before slicing.
Q3: Can I use flavored Oreos?
Absolutely, flavors like mint or golden Oreos work wonderfully.
Q4: How long does Oreo Sushi last?
It’s best enjoyed fresh but keeps up to 2 days in the fridge.
Q5: Can I freeze Oreo Sushi?
Freezing isn’t recommended since it alters the texture.
Q6: Can kids help with this recipe?
Definitely, it’s a fun, safe, and mess-friendly recipe for little helpers.
Q7: Do I need extra cream cheese or frosting?
No, the Oreo cream is enough, but you can add frosting for variation.
Q8: Can I make this vegan?
Yes, use vegan sandwich cookies and a dairy-free filling.
Q9: How do I get perfect slices?
A sharp knife wiped clean between cuts makes all the difference.
Q10: Can I serve this at parties?
Of course, it’s a crowd favorite and always sparks conversation.
Conclusion
Oreo Sushi is proof that food can be fun, surprising, and utterly delicious with just two simple ingredients. It’s quick to make, delightful to serve, and guaranteed to bring joy with every bite. So grab a pack of Oreos, roll up your sleeves, and get ready to impress — this one’s a total game-changer
Print
2-Ingredient Oreo Sushi Recipe
- Prep Time: 15 minutes
- Cook Time: 0 minutes
- Total Time: 15 minutes
- Yield: 6 servings (about 12 sushi pieces)
- Category: Dessert
- Method: No-bake, roll-and-chill
- Cuisine: Fusion
- Diet: Vegetarian
Description
Playful, no-bake dessert bites made from crushed Oreo cookies and their creamy filling, rolled into sushi-style slices. Quick to assemble, crowd-pleasing, and perfect for parties or a fun snack.
Ingredients
- Oreo sandwich cookies, 24 pieces
- Oreo cream filling, reserved from the cookies (used to spread as the filling)
Instructions
- Prepare your equipment, get a food processor or a zip-top bag and rolling pin ready.
- Separate the Oreo cookies, scraping and reserving the cream filling for later.
- Crush the cookie wafers into fine crumbs using a food processor or by placing them in a zip-top bag and pounding with a rolling pin.
- Press the crushed cookies into a pliable dough, adding a teaspoon of reserved cream if needed to help bind the crumbs together.
- Lay a sheet of plastic wrap on a clean surface and spread the cookie dough into a thin rectangle about 8 by 6 inches.
- Evenly spread the reserved Oreo cream filling across the cookie rectangle in a thin layer, leaving a small margin at the edge.
- Using the plastic wrap to help, roll the rectangle tightly into a sushi-style log and twist the ends to seal.
- Chill the log in the refrigerator for 15 to 20 minutes to firm up.
- Unwrap the chilled log and slice into 12 even pieces with a sharp knife, wiping the blade between cuts for clean edges.
- Arrange on a platter, garnish as desired, and serve immediately.
Notes
- Chilling the roll before slicing helps achieve clean, shape-holding pieces.
- If you do not have a food processor, crush the cookies in a sealed bag with a rolling pin until very fine.
- Wipe the knife between cuts for neat slices and less crumbling.
Nutrition
- Serving Size: 1 serving (about 2 sushi pieces, approx 1/6 of recipe)
- Calories: 210 kcal
- Sugar: 19 g
- Sodium: 180 mg
- Fat: 9.2 g
- Saturated Fat: 2.8 g
- Unsaturated Fat: 6.4 g
- Trans Fat: 0 g
- Carbohydrates: 33.2 g
- Fiber: 1.6 g
- Protein: 2 g
- Cholesterol: 0 mg